Anyone can walk into a store or electronics dealer and buy a ready-made weather station. But when it comes to integrating weather data into your own smart home or IoT setup, things get tricky: the number of devices with open interfaces quickly thins out, and truly open systems tend to come with a hefty price tag.
So why not build your own weather station?
That’s exactly what I did — using a simple Arduino microcontroller and a few reliable sensors.
Why DIY?
Buying a weather station is easy. But:
- You often get locked into closed ecosystems
- APIs (if available) are limited, undocumented, or cloud-bound
- Extending or repurposing data for smart home logic is difficult
- Prices for “open” systems are often unjustified
By building your own solution, you remain flexible and in full control — plus, it’s much more fun.
Sensor Evolution: From DHT22 to BME280
My first DIY weather station used a DHT22 sensor — a classic starting point for measuring temperature and humidity. However, it’s not suitable for long-term outdoor use. Over time, it failed and began reporting a constant 100% humidity.
In the second generation (GEN2), I switched to the BME280 — a much more robust and precise sensor. It provides:
- Temperature
- Humidity
- Barometric pressure
That’s three reliable data points from one tiny chip, with excellent I²C support and Arduino libraries.
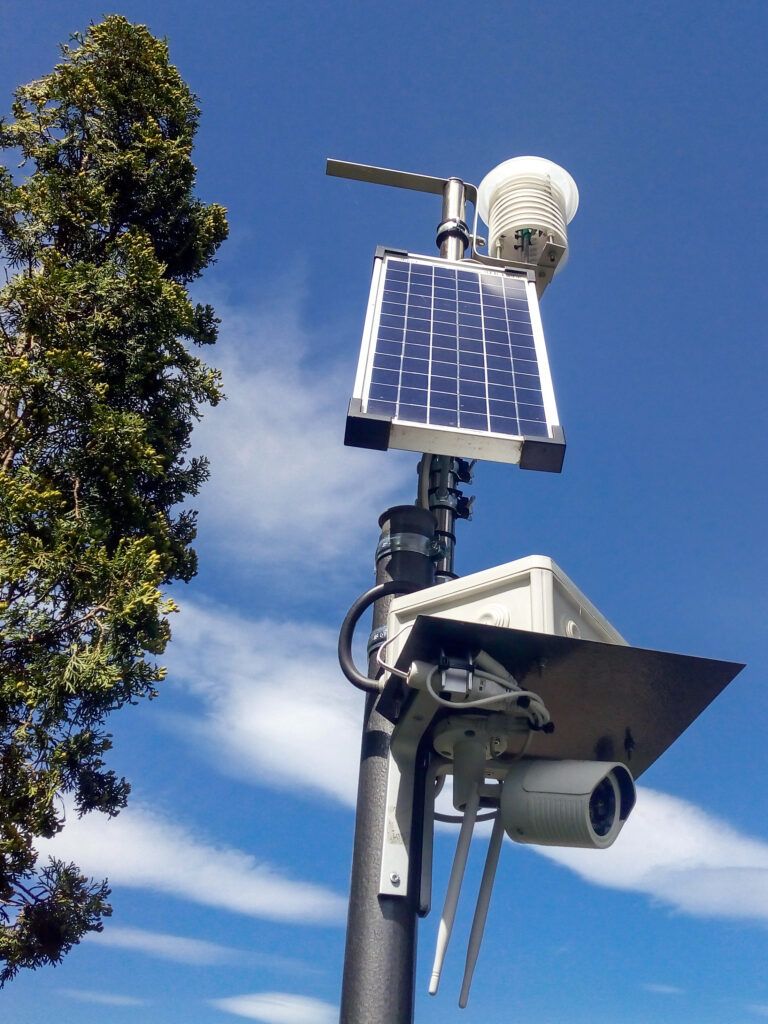
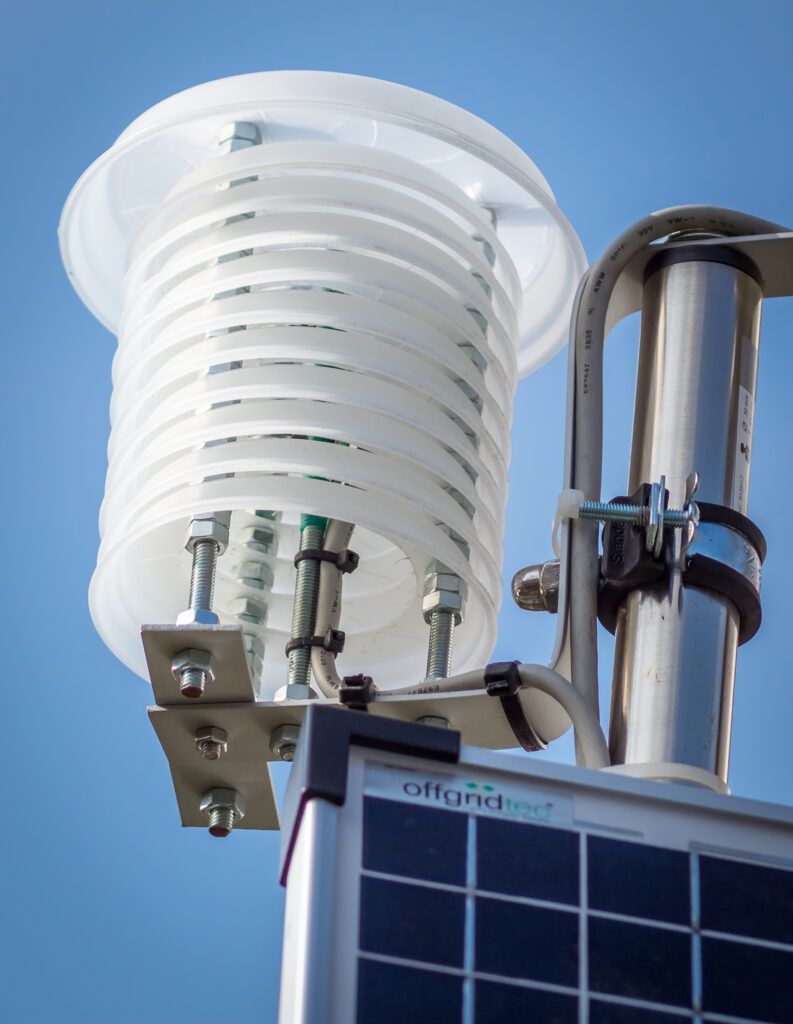
DIY Construction – Creativity Required
A weather station isn’t just sensors and code. You need a robust, weather-resistant housing and a stable mount — and if you’re not buying a ready-made kit, you’ll have to get creative.
Here’s how I approached it:
- Mounting rod: Chrome-plated table leg
- Cross braces: Aluminum flat bars (DIY store)
- Sensor housing: Transparent orchid pot saucers (UV-resistant and well-ventilated)
- Electronics enclosure: OBO Bettermann junction box
- Important: drill several 6 mm holes at the bottom to allow for ventilation and condensation drainage
The result? A fully functional outdoor station, made from affordable and durable materials.
Arduino & Data Integration
The Arduino reads the BME280 values and can:
- Output via serial or MQTT
- Log data locally to SD card
- Be extended with Wi-Fi (ESP8266 or ESP32)
- Integrate with Home Assistant, Node-RED, or any MQTT-compatible platform
It’s an ideal foundation for future upgrades like rain sensors, wind gauges, or solar radiation measurement.
Final Thoughts
Building your own weather station is not only a rewarding hardware project — it gives you freedom over your data, sensors, and smart home logic. With an Arduino and a handful of parts from the electronics and DIY store, you can create a system that outperforms many commercial devices in flexibility.