The ESP32 is one of the most popular choices for building a Meshtastic node. It combines low cost, Wi-Fi and Bluetooth connectivity, and solid community support, making it ideal for first-time users as well as hobbyists who want flexibility.
Choosing the Right Platform
Meshtastic supports several hardware platforms, each with its own strengths and trade-offs. The choice of platform influences factors such as power consumption, connectivity options, available devices, and overall ecosystem maturity.
In practice, most users start with widely available and well-supported hardware, while more specialized setups may benefit from ultra-low-power designs or newer microcontroller platforms. The following table provides a quick overview of the most relevant platforms currently used for Meshtastic nodes.
| Platform | Key Characteristics | Advantages | Limitations |
| ESP32 | The most widely used platform in the Meshtastic ecosystem. Many ready-to-use devices are based on ESP32, often including WiFi and BLE capabilities. | Large community, excellent Meshtastic support, wide range of hardware such as Heltec V3/V4, LilyGO T-Beam, and T-Deck. | Higher power consumption compared to other platforms, which can reduce battery runtime. |
| nRF52 | Designed for low-power operation and commonly used in battery-driven or solar-powered nodes. Integrated BLE support makes it well suited for lightweight communication scenarios. | Very energy efficient, stable platform, well suited for long-running remote nodes. | Lower processing power and a smaller ecosystem compared to ESP32-based devices. |
| RP2040 / RP2350 | Microcontrollers developed by Raspberry Pi. The RP2350 is the newer generation with improved capabilities. | Efficient architecture and solid performance for embedded applications. | Currently fewer Meshtastic devices and a smaller hardware ecosystem. |
In most situations, ESP32-based devices remain the easiest starting point, especially for new Meshtastic users. For deployments where battery life is the primary concern, nRF52-based hardware can provide significant advantages. The Raspberry Pi microcontroller family, particularly the RP2350, represents an interesting emerging option as the ecosystem continues to grow.
ESP32 Hardware Overview
Before assembling your node, it’s important to understand the hardware components you’ll need. An ESP32-based Meshtastic node consists of a microcontroller board, a LoRa radio module, an antenna, and a power source.
Official Hardware List
Meshtastic maintains an up-to-date list of supported ESP32 boards and LoRa modules. Referencing this list ensures you select a fully compatible board for your node:
Meshtastic Supported Hardware
Antennas and Power
- Antenna: Use a tuned 433/868/915 MHz antenna depending on your region. Proper placement is crucial for maximum range – avoid shielding or metal enclosures.
- Power source: USB power or LiPo battery. For portable nodes, LiPo offers days of runtime; for stationary setups, USB or wall adapters are sufficient.
With your hardware selected according to the official list, the next step is assembling the ESP32 node and preparing it for firmware installation.
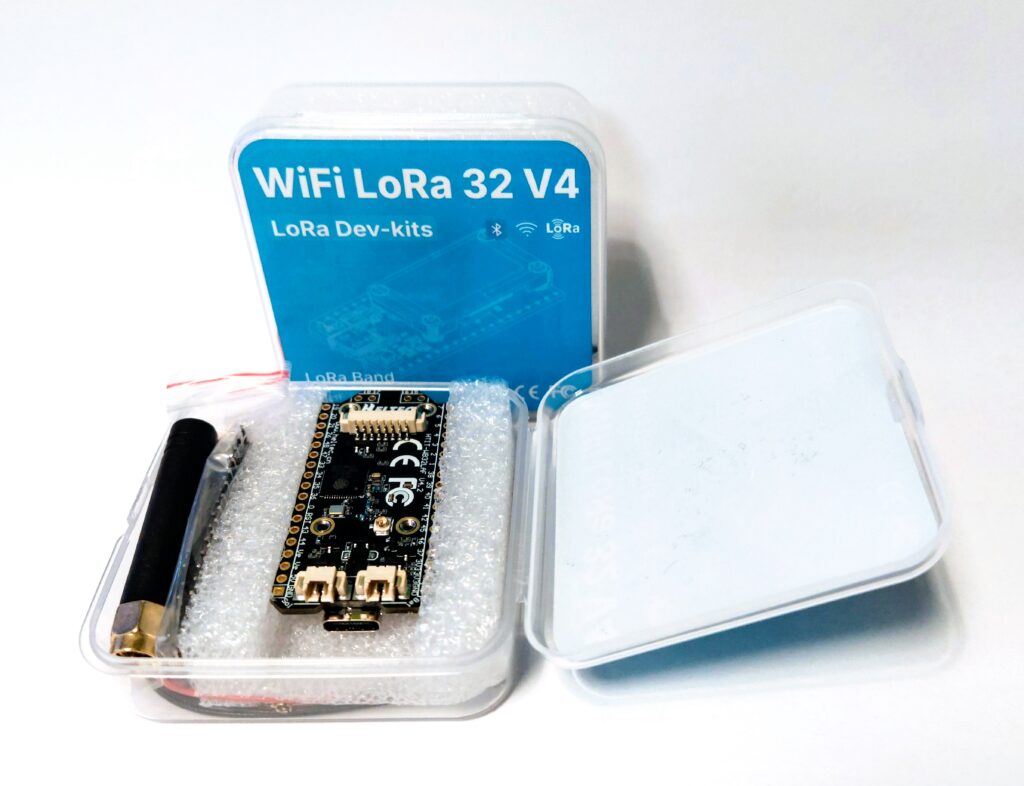
Heltec ESP32 LoRa Dev Boards: V3 vs V4
Heltec ESP32 LoRa development boards are among the most popular platforms for building Meshtastic nodes and LoRa-based IoT devices. They combine an ESP32 microcontroller with a Semtech LoRa transceiver and usually include an integrated OLED display, making them a compact and versatile solution.
Over the years, Heltec has released several revisions of this board. The two most common versions used today are the V3 and the newer V4. While both boards are compatible with typical LoRa and Meshtastic use cases, the V4 introduces several significant improvements in performance, power efficiency, and expandability.
Hardware Comparison
| Feature | ESP32 LoRa V3 | ESP32 LoRa V4 |
| Core Chip | ESP32 (Standard) | ESP32-S3R2 – faster, more efficient, AI instruction support |
| LoRa Chip | SX1276 / SX1278 | SX1262 – higher sensitivity (~-137 dBm) and up to 28 dBm TX power |
| RAM / Flash | ~520 KB RAM / 4–8 MB Flash | 2 MB PSRAM + 16 MB Flash |
| Connectivity | LoRa + Wi-Fi | LoRa + Wi-Fi + Bluetooth LE 5 |
| Frequency | 433 / 868 / 915 MHz variants | 863–928 MHz wideband support |
| Antenna | Single LoRa antenna | Dual IP-EX antennas (LoRa + 2.4 GHz) |
| Expansion | Basic GPIO | SH1.25 GNSS connector + solar input |
| Display | Optional small OLED | Integrated 0.96″ OLED |
| Battery & Power | External battery required | 3000 mAh Li-Ion support, USB-C charging, solar input |
| Low-Power Mode | Basic deep sleep | <20 µA deep sleep capability |
| Software Support | Arduino, MicroPython | Arduino, MicroPython, ESP-IDF |
What Changed in the V4
The most important upgrade is the combination of ESP32-S3 and SX1262. The newer LoRa transceiver improves receiver sensitivity and transmission power, which can directly translate into longer range and more stable links in real-world deployments.
The 2 MB PSRAM is another major improvement. While the V3 already works well for simple nodes, the additional memory of the V4 allows more complex firmware, smoother OLED updates, and better multitasking when Wi-Fi, BLE, and LoRa are used simultaneously.
Connectivity also improves significantly. The V4 adds Bluetooth LE 5, which is useful for smartphone configuration or hybrid communication setups. The dual antenna design separates the LoRa and 2.4 GHz radios, reducing interference.
For portable deployments, the V4 also introduces features that make it much easier to build off-grid nodes. Integrated battery charging, support for 3000 mAh Li-Ion batteries, and an optional solar input allow long-running field installations.
Which Version Should You Choose
Both boards still have their place depending on the use case.
ESP32 LoRa V3
Good choice when:
- You want the lowest cost entry point
- You are building simple stationary nodes
- Power consumption and battery operation are not critical
- You already have external power or battery management
ESP32 LoRa V4
Recommended when:
- You want a portable Meshtastic node
- Battery and solar operation are important
- You need better LoRa range and sensitivity
- You want BLE support for mobile configuration
- You plan more complex firmware or automation
Recommendation
For most new Meshtastic deployments, the ESP32 LoRa V4 is the better long-term choice. The improved LoRa chip, additional memory, and integrated power management make it much more suitable for portable nodes and off-grid installations.
The V3 still remains a solid budget option, especially for indoor gateways or experimental setups where power consumption and advanced features are less important.
Requirements for a Portable Meshtastic Node Case
Hardware Compatibility
- Must fit Heltec WiFi LoRa 32 V4
- Secure mounting for PCB and OLED display
- Dedicated space for ~3000 mAh LiPo battery
- Optional support for GPS / GNSS module
RF Design
- External antenna support required (e.g. SMA connector)
- No reliance on weak onboard antennas
- Optimized for stable LoRa range in outdoor environments
Mechanical Design
- Compact, handheld-friendly form factor
- Suitable for outdoor use (hiking, field testing, emergency scenarios)
- Robust enough for daily transport and handling
Assembly & Maintenance
- Simple assembly process
- No proprietary or hard-to-source parts
- Preferably minimal hardware requirements
Manufacturability
- Printable on standard FDM printers
- No exotic materials required
- Works reliably with common filaments like PETG
Selected Design
Based on these requirements, I chose the H1 Big Case for Heltec V4 running Meshtastic for standard & bendable antennas by Christian Undso, as it aligns well with the practical needs of a portable node setup.
A key advantage of this design is the simple snap-fit closure combined with a single standard screw, which can easily be sourced from any local hardware store. This keeps the build straightforward, avoids unnecessary specialty parts, and makes the case easy to reproduce.
There are also several other excellent designs available within the community. To keep track of them, I have collected the most relevant models and remixes in a dedicated Printables collection for reference here: https://www.printables.com/@PrintExplore_4021010/collections/3344371
Step-by-Step Assembly
- Connect the LoRa Module
- Attach a LoRa module compatible with your ESP32 board.
- Refer to the official Meshtastic hardware documentation for guidance on connections: Meshtastic Supported Hardware.
- Attach the Antenna
- Connect the antenna according to the module instructions.
- Ensure it is fully extended and not obstructed by metal or shielding.
- Power Connection
- For initial setup, USB power is sufficient.
- For portable or remote nodes, a LiPo battery can be used if supported by your board.
- Optional Accessories
- Enclosure or case for protection.
- Mounting if the node will be stationary outdoors.
Once assembled, the ESP32 node is ready for firmware installation, which will allow it to join the Meshtastic mesh network.