The AnyTone AT-D878UVII Plus V2 offers numerous features for amateur radio. Especially at the beginning, the large number of settings in the CPS can seem confusing. This first article therefore focuses only on the basic steps: preparing the radio, installing the appropriate programming software, creating a backup, and setting up a simple analog configuration.
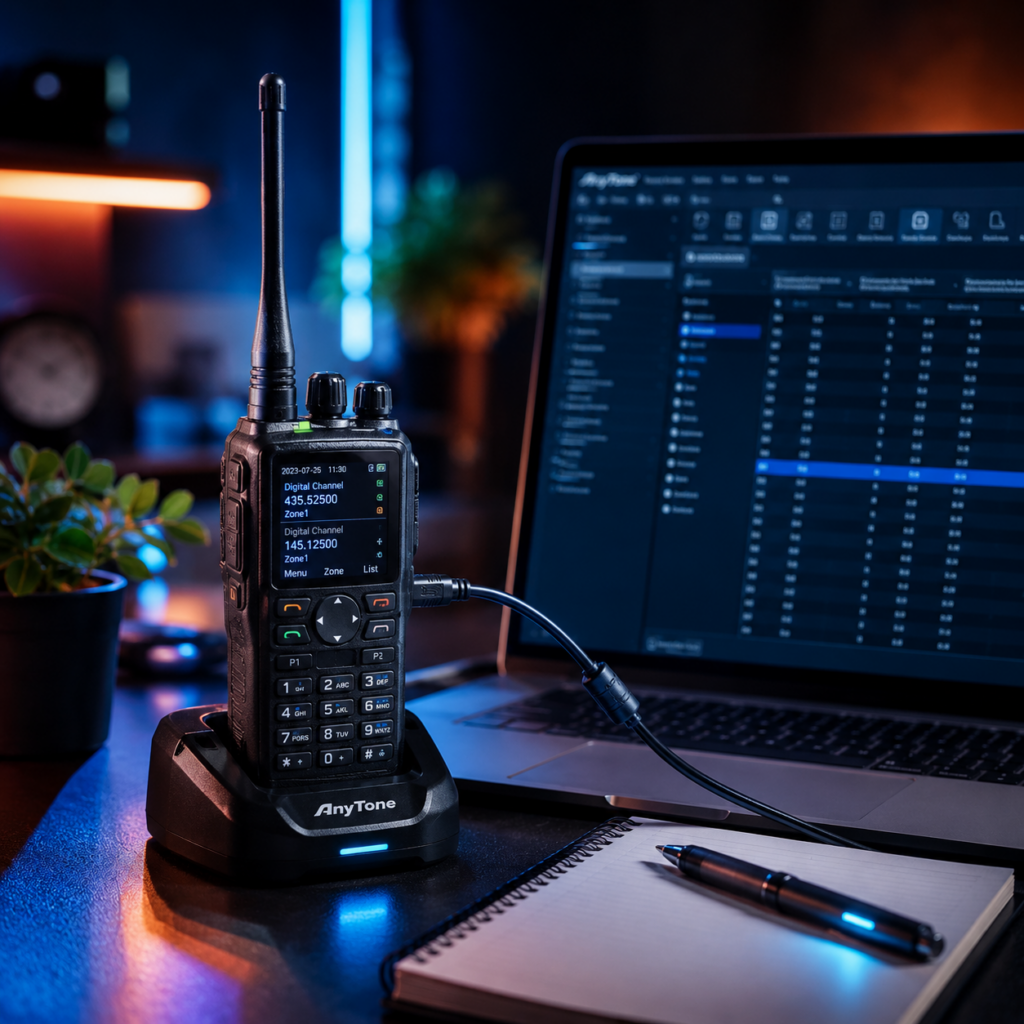
Requirements and Necessary Equipment
For the first steps, you will need:
- AnyTone AT-D878UVII Plus V2
- Battery
- Charger or charging cradle
- Suitable USB programming cable
- Windows computer
- Appropriate AnyTone CPS software
- Valid amateur radio authorization for the intended operation
Transmit only if you are authorized to do so. Frequencies, transmit power, and operating modes must comply with applicable laws and regulations as well as the relevant band plan.
Whenever possible, use a known, compatible programming cable. An unsuitable or defective cable may prevent the radio from being recognized or interrupt a read or write operation.
Unboxing and Initial Setup
After unpacking the radio,
- Attach the supplied antenna to the antenna connector and insert the supplied battery.
- Before using the radio for the first time, fully charge the battery using the supplied rapid charger.
- The AT-D878UV II Plus (Version 2) is supplied with a USB-A power adapter and a USB-A to USB-C cable. Earlier versions were supplied with a charger requiring a Schuko-to-US plug adapter.
- Place the radio in the charging cradle and let the battery charge completely. Once fully charged, the radio is ready for configuration.
- It is also recommended to charge the Bluetooth PTT button at the same time. The PTT button can be charged using a standard USB-C power adapter.
- Both the radio and the Bluetooth PTT button indicate the charging process with a red LED. The LED remains illuminated in red while the respective device is charging.
Setting the Date and Time
After the first startup, configure the date and time.
For amateur radio operation, it is recommended to use UTC (Coordinated Universal Time) as the time reference. This avoids having to change the time zone setting between daylight saving time and standard time.
- Set the time zone to GMT+0:00 and enter the current UTC time.
- For example, during German daylight saving time (CEST), local time is UTC+2. During standard time (CET), local time is UTC+1. The radio itself remains configured to UTC throughout the year.
Using UTC is particularly useful for amateur radio, as UTC is commonly used for QSO logging, contest operation, and other radio-related records.
Check the Exact Radio Model and Firmware
Before installing software or changing settings, verify the exact model and firmware family. The AnyTone AT-D878UVII Plus V2 must not be confused with files or CPS versions for other models.
Check the following:
- Model designation on the radio or packaging
- Version information in the radio
- Firmware information in the menu or CPS
- Manufacturer’s notes regarding the appropriate software version
On the radio, open:
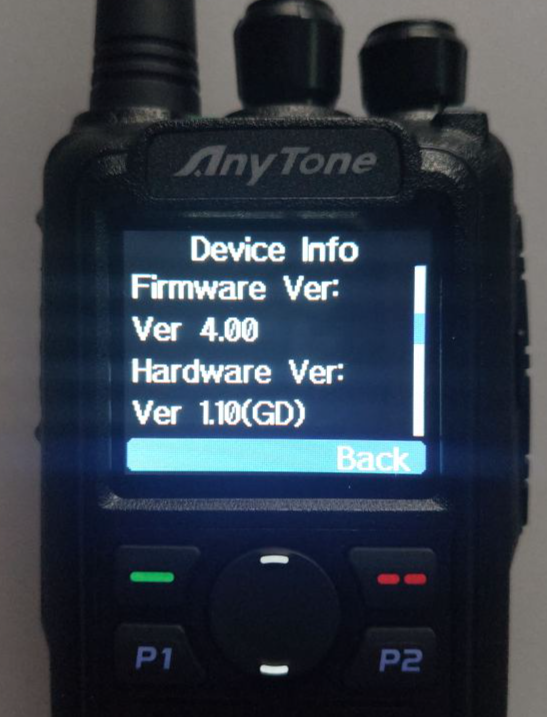
Menu → Settings → [3] Device InfoScroll down to find the Firmware Version.
Note down the version shown on the display. You should then download the CPS version that corresponds to your installed firmware. For example, a radio running firmware V3.08 requires the corresponding CPS V3.08.
⚠️ Important: The AT-D878UVII/UVII Plus V2 uses a different CPS and firmware family from the older AT-D878UV/UV Plus (V1). These versions are not interchangeable.
Download the CPS and USB Driver
Download the required software from the official AnyTone website:
AnyTone Official Download Area
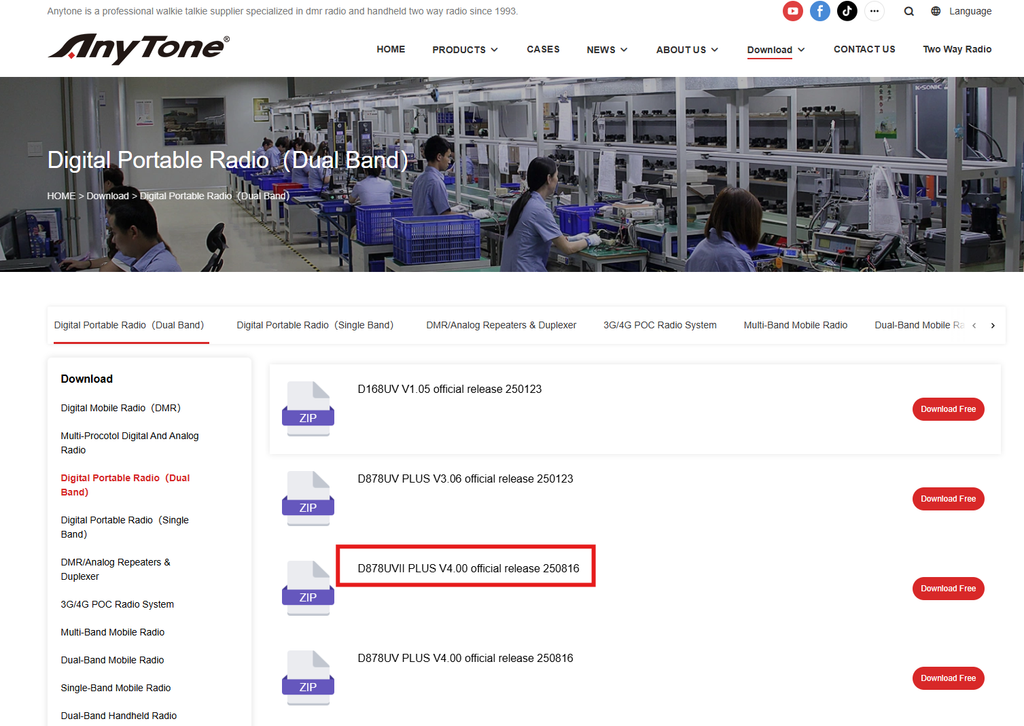
Select the software specifically for the AT-D878UVII Plus in my case the Version V4.00 cause this is the current installed firmware version we checked in the last step. Always use the CPS and firmware version intended for your radio model.
Depending on your Windows installation and programming cable, you may also need to install a USB driver. If Windows does not recognize the radio, check the driver provided in the AnyTone download area and install it before continuing.
Do not update the firmware yet. First install the CPS, make sure the programming cable works, and create a backup of the original radio configuration.
Install the CPS
Install the CPS according to the manufacturer’s instructions. Unless the instructions specify otherwise, do not connect the radio to the computer during installation.
D878UVII PLUS V4.00 official release 250815\D878UVII V4.00 CPS\D878UVII_Setup_4.00.exeAfter installation, start the CPS and check that it opens without displaying an error. If a driver is required for the programming cable, install it according to the manufacturer’s instructions as well.
Connect the Radio to the Computer
⚠️ Warning: Protect Your Radio and USB Interface
Always take extra care when connecting your AT-D878UVII Plus V2 to a computer or charger:
- Never press the PTT button while the radio is connected via USB or placed in its charger. RF energy can be coupled into the USB cable or charging circuitry and may damage the radio, USB interface, or charger.
- Do not leave the USB cable connected when using features that can transmit automatically, such as APRS or Roaming. An unintended transmission can cause RF energy to enter the USB connection.
- Keep the radio at least 30 cm away from mobile phones, cordless phones, and Wi-Fi equipment during operation.
- Be careful when applying advanced or non-standard modifications. Writing incorrect or incompatible data to the radio can cause malfunctions or, in some cases, prevent the radio from operating correctly.
These precautions are simple to follow and can help prevent avoidable damage to your radio and connected equipment.
Turn off the radio and connect it to the computer:
- Connect the programming cable to the radio.
- Plug the USB connector into the computer.
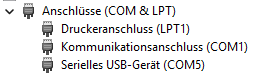
- Turn on the radio. New COM-Port (here: COM5) should come up
- Start the CPS.
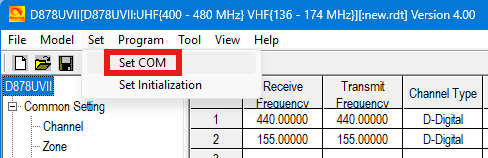
- Check that the correct communication port is selected.
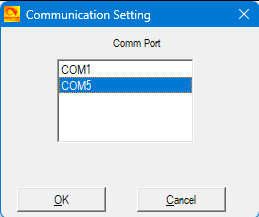
Do not interrupt the connection while data is being read or written.
Read the Existing Configuration
Read the radio before making any changes. This gives you a copy of the configuration currently stored in the radio.
The exact menu name may vary depending on the CPS version. You will often find the function under a name such as:
Program → Read from Radio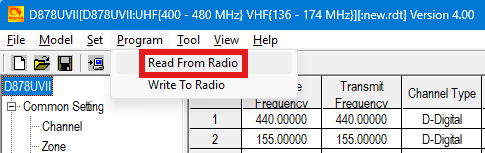
- A confirmation dialog will appear: “Read data from radio. Do you wish to continue?”
- Confirm the dialog by clicking OK.
- In the Read or Write Objects dialog, select both Digital Contact List and Other Data before proceeding.
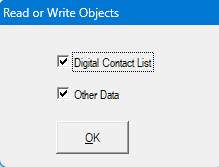
- Wait until it has completed (D8798UVII, Read Data Completed) fully. Do not turn off the radio or disconnect the cable.
Save an Unmodified Backup
Immediately save the configuration you have read as an unmodified original file. This file should not be edited or overwritten.
A useful filename might look like this:
AT-D878UVII-V2-PLUS_2026-09-01_original.rdtAlso store this file in a safe location. For example, you can keep a copy on an external storage device or in a protected cloud storage account.
The original file is important if a later change does not work or if you want to return to the initial state.
Keep Configuration Versions
It is a good practice to keep separate versions of your codeplug instead of continuously overwriting the same file. This allows you to return to a known working configuration and makes it easier to identify when a particular change was introduced.
A simple naming convention using the date and a sequential version number works well:
AT-D878UVII-V2-PLUS_2026-09-01_original.rdt
AT-D878UVII-V2-PLUS_2026-09-01_v001_basic-analog.rdt
AT-D878UVII-V2-PLUS_2026-09-02_v002_repeater.rdt
AT-D878UVII-V2-PLUS_2026-09-08_v003_dmr.rdt- The
originalfile is always kept unchanged. Each subsequent configuration is saved as a new version. - When making several changes on the same day, simply increase the version number rather than overwriting the previous file.
- This approach gives you a simple history of your configuration and provides a reliable way to roll back if a change causes unexpected behavior.
- Before every major modification or write operation, save the current configuration as a new version.
Enable All Available CPS Options
After installing the CPS, it is worth checking whether all available configuration sections are enabled.
Depending on the CPS version, some settings may be hidden by default. If a configuration option appears to be missing, it may simply be disabled in the CPS display or options settings.
Open the CPS options and enable the available configuration sections if appropriate. This makes the complete configuration structure visible and avoids confusion when following programming instructions later.
The exact location and available options may vary between CPS versions.
Enter Basic Device Information
After creating the backup, you can create a working copy of the configuration. Never edit the only existing original file.
Depending on the CPS version, the general device settings may include:
| Menu Path | Setting | Default | Recommended |
|---|---|---|---|
| Common Settings → Optional Settings → GPS/Ranging | Get GPS Positioning | Off | On |
| Common Settings → Optional Settings → Display | Auto Backlight Duration | 5 s | 30 s to 1 m |
| Common Settings → Optional Settings → Work Mode | Sub-Channel Mode | On | Off (for the very beginning) |
| Common Settings → Optional Settings → Work Mode | Choose Working Mode | May vary | Amateur Mode |
| Common Settings → Optional Settings → Volume/Audio | Maximum Volume | 7 | 5 |
| Common Settings → Optional Settings → Volume/Audio | Max Headphone Volume | 7 | 5 |
| Common Settings → Optional Settings → Volume/Audio | Analog Microphone Gain | 3 | 4 |
| Common Settings → Optional Settings → Volume/Audio | Digital Microphone Gain | 3 | 4 |
| Common Settings → Optional Settings → Volume/Audio | Enhanced Sound Quality | Off | On |
| Common Settings → Optional Settings → Alert Tone | Key Tone | On | Off |
| Common Settings → Optional Settings → Alert Tone | Startup Sound | On | Off |
| Common Settings → Optional Settings → Other | Language | English | Whatever you prefer |
| Digital → Master id → Master ID | Master ID | 1234567 | Your personal digital ID |
| Digital → Master id → Master ID | Master ID Name | Your personal Call Sign |
Enter only information that is required for your radio and operating mode. The Radio ID is particularly relevant for DMR and must be an ID assigned to you. However, a complete DMR configuration is not part of this first article.
Check the Programmable Buttons
The AnyTone AT-D878UVII Plus V2 has programmable buttons. Check which functions are assigned to the buttons, and change them only if you have a specific reason to do so.
For beginners, frequently used functions may be useful, for example:
- Monitor
- Scan
- Transmit power
- Zone change
- Voice announcements
The key assignments can be configured in the CPS under Common Settings → Optional Settings → Key Function.
| Key | Press | Default function | Recommended assignment | Description |
|---|---|---|---|---|
| PF1 | Short | Voltage | Sub PTT | Transmits using the secondary channel. |
| PF2 | Short | Monitor | Monitor | Temporarily opens the squelch to listen for weak signals. |
| PF3 | Short | Alarm | Off | |
| P1 | Short | Main Channel Switch | Main Channel Switch | Provides quick access to zone selection. |
| P2 | Short | V/M | V/M | Switches between VFO and memory channel mode. |
| PF1 | Long | Off | Scan | Starts or stops scanning programmed channels. |
| PF2 | Long | Off | Power | Changes the transmit power level. |
| PF3 | Long | Off | Off | |
| P1 | Long | Off | Off | |
| P2 | Long | Off | Channel Type Switch | Switches the selected channel between Analog (FM) and Digital (DMR) mode. |
💭 Think about this: The PF1 and PF2 buttons are located directly below the PTT button. Avoid assigning “short”-functions to these buttons that can change the current channel, especially when operating through a repeater. Accidentally pressing the wrong button can switch you to another channel and cause you to lose the ongoing conversation.
Make a note of your changes. This will help you remember which function is assigned to each button.
Write the Configuration to the Radio
Save your working copy before transferring it to the radio. For example:
AT-D878UVII-V2-PLUS_2026-09-01_v001_basic-analog.rdtThen start the write operation, which may be called Write to Radio or Write Data depending on the CPS version.
During the write process:
- Do not remove the USB cable.
- Do not turn off the radio.
- Do not allow the computer to enter sleep mode.
- Do not use other programs that could interfere with the USB connection.
Wait until the CPS reports that the operation has completed successfully.
Essential Basics
This chapter provides a quick overview of the most important settings, controls, and concepts you should know before using the AnyTone AT-D878UV II Plus (Version 2). It is intended as a practical starting point for beginners, helping you understand the radio’s basic functions before moving on to more advanced configuration.
| Location | Indicator | Meaning / Function |
|---|---|---|
| Display | Bars / signal-strength icon | Signal Strength / S-Meter: Indicates the strength of the received signal. More bars indicate a stronger received signal. |
| Display | L / M / H / T | Transmit Power: L = Low, M = Medium, H = High, T = Turbo |
Switching a Channel from Digital to Analog
Select the desired channel, for example SX 70FM 5000, and change the channel type to analog:
MENU > Settings > [2] Chan Set > [3] Channel Type > [1] A-AnalogConfirm with OK.
The selected channel is now configured for analog FM operation.
Conclusion
The most important first step is not to program as many functions as possible. The next article will explain how codeplugs are structured and how channels, zones, contacts, and other CPS objects work together.