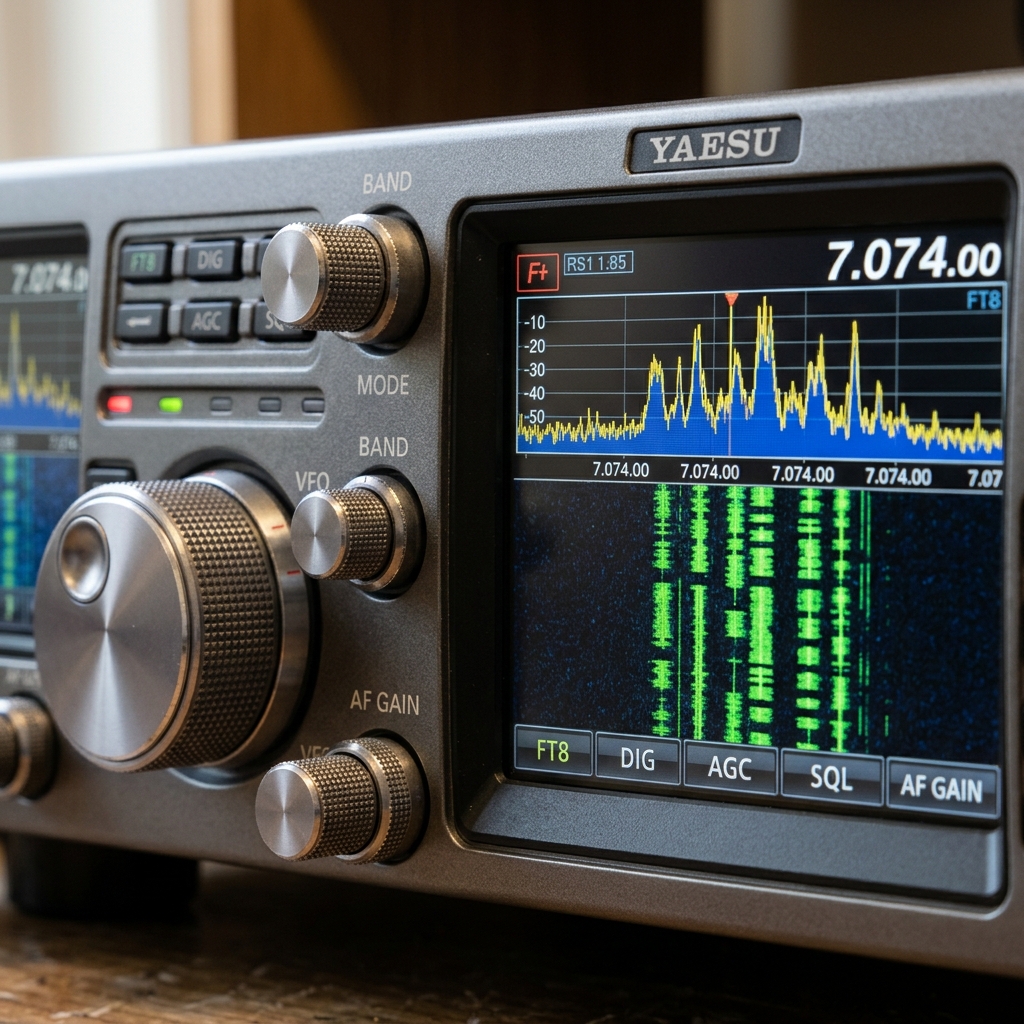
Digital amateur radio has opened up new possibilities for radio operators who want to make contacts over long distances without relying on voice communication. One of the most popular digital modes is FT8, which allows stations to exchange short messages even when signals are too weak to be heard by the human ear.
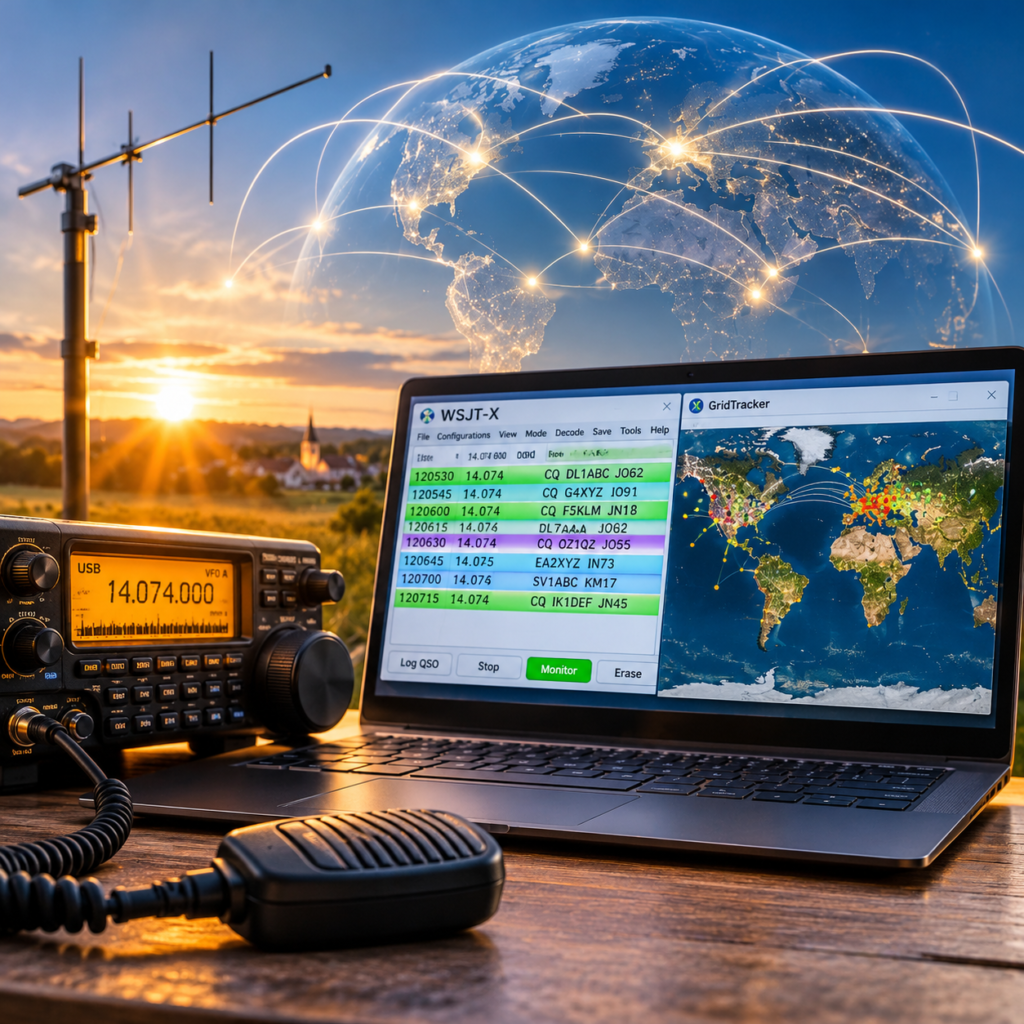
In this guide, we will explore FT8 and the software used to operate it. We will compare the original WSJT-X with the independently developed WS Digital Mode Suite (WS), which builds upon the original project and introduces additional features and digital modes. Finally, we will walk through installing and configuring WSJT-X.
What is FT8?
FT8 is part of a broader family of digital modes supported by WSJT-X, including FT4, JT65, Q65, and WSPR. The independently developed WS Digital Mode Suite (WS) extends this selection with additional modes such as FT2. FT8 is an excellent starting point for digital amateur radio because it is widely used, well documented, and relatively eäsy to get started with.
Unlike SSB or FM, FT8 does not require you to understand speech through background noise. It uses carefully timed transmissions, typically in 15-second cycles, to exchange callsigns, signal reports, and acknowledgements.
🚀 Ready to Get Started?
Even with just a few watts, digital modes can connect you with radio amateurs around the world. No expensive equipment or powerful transmitter needed – just your radio, an antenna, and the right software. Let’s get started!
Why use digital modes?
- Weak signals: Make contacts even when signals are difficult to hear.
- Low power: Reach distant stations without needing a high-power transmitter.
- Automation: Software handles decoding and much of the contact exchange.
- Long distances: Contact stations worldwide, even with modest equipment.
FT8 is part of a broader family of digital modes supported by WSJT-X, including FT4, JT65, Q65, and WSPR. The WS software suite also supports FT2. FT8 is an excellent starting point for digital amateur radio because it is widely used, well documented, and relatively easy to get started with.
What you need
Before installing WSJT-X, make sure you have the following:
- A Windows 10 or Windows 11 PC
- An amateur radio transceiver that supports SSB
- An antenna suitable for your chosen amateur radio band
- A USB cable or compatible audio interface to connect your radio to the computer
- CAT control support, if you want to control the radio directly from WSJT-X
- An amateur radio licence valid for the frequencies and modes you intend to use
- An internet connection for downloading the software and synchronizing your computer’s clock
A modern transceiver with a built-in USB audio interface and CAT control makes setup much easier. Older radios may require an external interface.
You do not need a powerful computer or a Linux system. A regular Windows PC is perfectly sufficient for operating digital modes such as FT8, FT4, FT2, and other modes supported by your chosen software.
WSJT-X vs. WS Digital Mode Suite
There are several software packages for digital amateur radio, each with its own advantages and disadvantages. However, WSJT-X is the established reference standard for weak-signal modes such as FT8.
- WSJT-X is the original software developed by Joe Taylor, K1JT, and the WSJT Development Team. It is a solid choice for beginners and supports a wide range of digital modes. WSJT-X Official Website
- WS, formerly known as WSJT-X Improved, is an independent development based on the original software. It adds features, alternative interface layouts, and additional modes such as FT2. WS Digital Mode Suite
For this guide, we will focus on WSJT-X, which provides everything you need to get started with digital modes.
💡Note: Both products can also be installed using Chocolatey. For more details, see this article.
choco install wsjtx -y
choco install gridtracker -y
Downloading and installing WSJT-X
Download WSJT-X
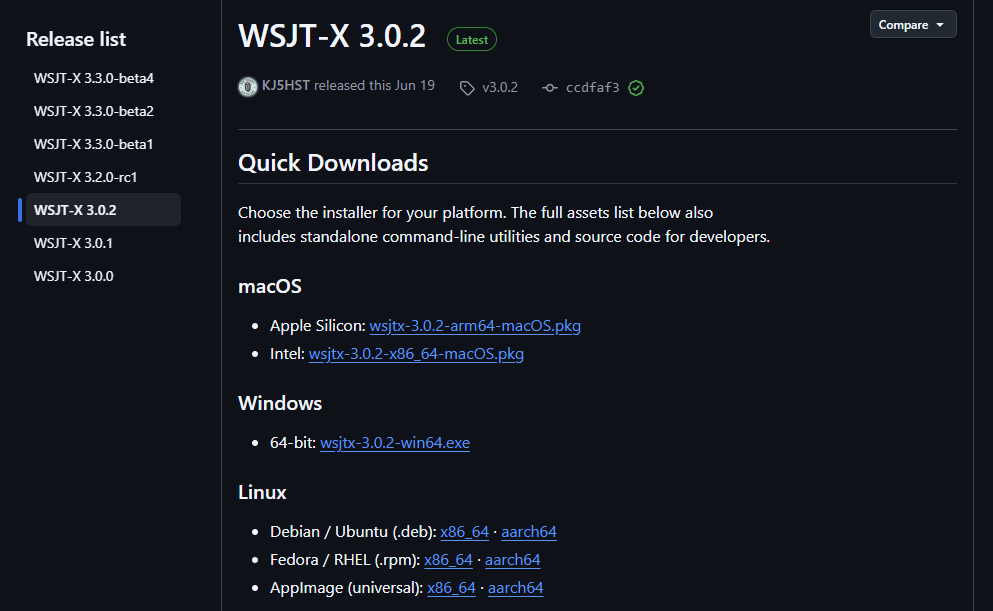
- The official WSJT-X website redirects users to GitHub for downloads. You can also download the software directly from the WSJT-X GitHub Releases page.
- Always select the latest stable release. Avoid versions marked as Pre-release or Beta.
- Under the release assets, download the Windows 64-bit installer named
wsjtx-<version>-win64.exe.
Install WSJT-X
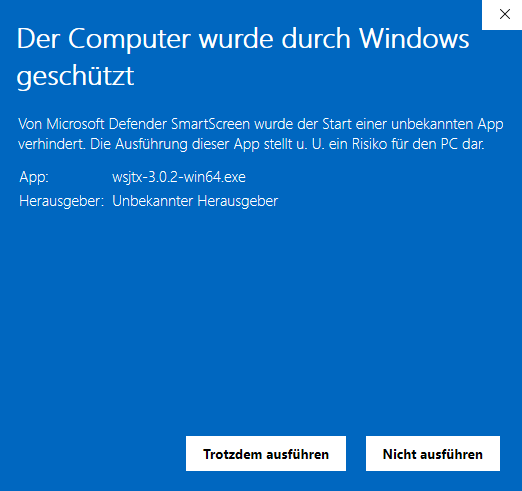
- Open the downloaded
.exefile. - If Windows displays an Unknown Publisher warning, this can be expected for the official installer. Make sure you downloaded it from the official website before proceeding.
- Follow the installation wizard.
- Add WSJT-X to the system PATH for the current user: Allows you to launch WSJT-X from the command line without specifying the full installation path.
- Create WSJT-X Desktop Icon: Creates a desktop shortcut for quick and easy access.
- Installation Directory: Keep the default installation path, typically
C:\WSJT\wsjtx. The official documentation recommends using a dedicated directory such asC:\WSJTXorC:\WSJT\WSJTXinstead ofC:\Program Files, and avoiding spaces in the directory path. - Complete the installation and launch WSJT-X from the Start menu.
That’s it! WSJT-X is now installed. In the next step, we will configure your callsign, grid locator, and radio connection.
Initial configuration
After launching WSJT-X, open File → Settings → General to configure your station.
Under Station Details, enter the following information:
- My Call: Enter your amateur radio callsign.
- My Grid: Enter your Maidenhead grid locator.
- IARU Region: Select Region 1 if you are operating in Germany.
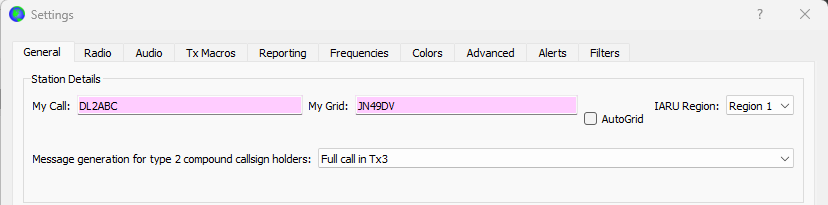
- Click OK to save your settings.
That’s all you need for now. We will configure your transceiver and audio devices next.
Configuring your radio
Open File → Settings → Radio to configure the connection between WSJT-X and your transceiver.
The settings depend on your radio model and how it is connected to your computer.
- Rig: Select your transceiver from the list.
- Serial Port: Select the COM port assigned to your radio, if applicable.
- Baud Rate: Match the baud rate configured in your transceiver.
- PTT Method: Select the appropriate method for controlling transmit, usually CAT for compatible radios.
- Mode: Select USB or the appropriate data mode according to your radio’s manual.
- Split Operation: Select
RigorFake Itif supported by your transceiver. This keeps the transmit audio frequency within the recommended range of approximately 1500 to 2000 Hz, helping to prevent unwanted audio harmonics from passing through the transmitter’s sideband filter.
Click Test CAT to check communication with your radio. If the test succeeds, WSJT-X can communicate with your transceiver.
Next, open the Audio tab and select the audio input and output devices associated with your radio. On many modern transceivers, these appear as USB audio devices in Windows.
Note: The exact settings vary between transceivers. Consult your radio’s manual for the correct CAT and audio configuration.
Synchronizing your computer clock
FT8 and other digital modes rely on accurate time synchronization. If your computer clock is significantly out of sync, you may miss transmissions or fail to decode signals correctly.
On Windows 10 or Windows 11:
- Open Settings → Time & language → Date & time.
- Enable Set time automatically.
- Click Sync now to synchronize your clock.
For reliable FT8 operation, your computer clock must be synchronized to UTC within approximately one second. Windows can continue displaying your local time; WSJT-X uses the underlying system clock for accurate transmission timing. If the built-in Windows time synchronization is insufficient, consider a dedicated NTP client such as Meinberg NTP.
Once your clock is synchronized, you’re ready to receive digital signals and prepare for your first contact.
Just listen: Your first FT8 signals
You don’t need your own radio or antenna to get started. A WebSDR is a remotely operated radio receiver that you can access directly through your browser. It lets you listen to real amateur radio signals received through an antenna at another location.
A good starting point is the 12db.de WebSDR Directory. Choose a receiver in your region, for example Mainz, or use the WebSDR in Twente.
Let’s try receiving some FT8 signals on the 10-metre band:
- Open a WebSDR receiver and tune to 28.074 MHz USB.
- Install and configure a virtual audio cable, such as VB-CABLE, to route the browser’s audio output directly into WSJT-X.
- 💡 Quick test without a virtual audio cable: If you just want to try FT8 decoding, you can simply play the WebSDR audio through your speakers and place a microphone close to them. Select that microphone as the audio input in WSJT-X. This may be sufficient for a first test, although background noise and acoustic feedback can affect decoding reliability.
- In WSJT-X, open File → Settings → Audio and select the virtual audio cable as the input device.
- Start receiving and decoding FT8 signals.
- This setup transfers the audio digitally without using speakers or a microphone, avoiding unnecessary background noise and feedback.
You should soon see callsigns appearing in WSJT-X’s Band Activity window.
Congratulations! Your first FT8 signals received – without owning a radio or antenna!
What is exchanged during an FT8 QSO?
Although FT8 is a digital mode, the basic idea is no different from a conventional amateur radio contact (QSO). Two stations exchange a few essential pieces of information in a predefined sequence.
principles as a traditional radio contact: identify yourself, exchange information and confirm reception.
A typical FT8 contact follows a predefined message sequence:
CQ K1ABC FN42
K1ABC G0XYZ IO91
G0XYZ K1ABC -19
K1ABC G0XYZ R-22
G0XYZ K1ABC RRR
K1ABC G0XYZ 73
The exchange follows these steps:
- CQ: One station calls for contacts and provides its grid locator.
- Callsigns and locator: The other station responds with its callsign and locator.
- Signal report: The calling station sends a signal-to-noise ratio (SNR) report, expressed in dB.
- Report confirmation: The receiving station acknowledges the report with
Rfollowed by its own signal report. - Acknowledgement: The first station confirms receipt using
RRR. - 73: The second station sends the final message, indicating that the contact is complete.
WSJT-X handles most of this exchange automatically through its predefined messages and automatic sequencing. Each FT8 transmission period lasts 15 seconds, with stations alternating between transmitting and receiving.
A complete QSO can usually be completed within a few minutes.
Receiving your first digital signals
Before transmitting, make sure WSJT-X is receiving audio from your transceiver.
- Switch your radio to the appropriate band and an FT8 operating frequency.
- Make sure the radio is in receive mode and the correct audio input is selected under File → Settings → Audio.
- Watch the waterfall display for signals.
- Check the Band Activity window for decoded messages from other stations.
If signals appear in the waterfall but no messages are decoded, check your audio levels, frequency, and computer clock synchronization.
Don’t worry if you don’t see many signals immediately. Activity depends on the band, propagation conditions, antenna, and time of day.
Once you can decode messages from other stations, you’re ready to make your first contact.
Making your first digital contact
Once WSJT-X is decoding signals, you can try making your first contact (QSO).
- Select a station in the Band Activity window.
- Double-click its decoded message to select the station and prepare a reply.
- Check that your callsign, grid locator, and transmit frequency are correct.
- Enable Enable Tx when you are ready to transmit.
- Monitor the automatic message sequence until the contact is completed.
WSJT-X handles most of the exchange automatically, including callsigns, signal reports, and acknowledgements.
💡 Important: Keep your transmit audio level low enough to avoid distortion, and ensure that your radio operates within your licence limits and the applicable band plan.
Once the QSO is complete, WSJT-X can log the contact for your station records.
Logging your contacts
- After completing a QSO, you can save the contact in WSJT-X by clicking Log QSO in the confirmation dialog.
- The log records details such as the callsign, date, time, band, mode, and signal reports.
- If you use an external logging application, WSJT-X also supports integrations and logging workflows through compatible tools.
- Keeping a log of your contacts helps you track your progress, document your activity, and confirm contacts for awards or other operating achievements.
Optional: Visualizing digital contacts with GridTracker
Want to see where the stations you receive are located around the world? GridTracker is a free companion application for WSJT-X that displays decoded stations and contacts on an interactive world map.
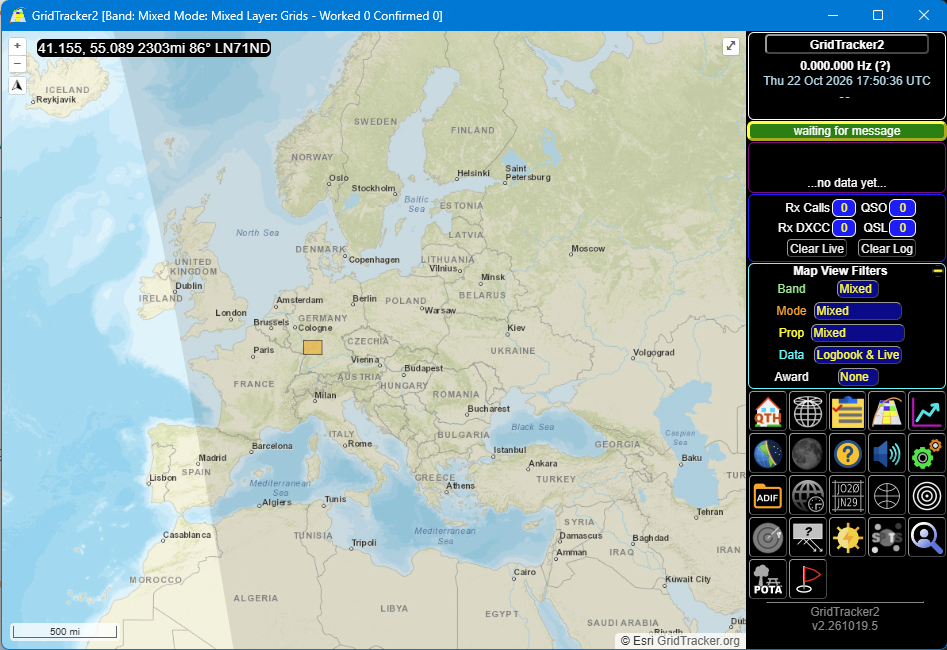
It receives data directly from WSJT-X and can visualize live activity, Maidenhead grid squares, contact paths, and information from your logbook. This makes it easier to understand propagation and see how far your signals reach.
Getting Started
- Download GridTracker Windows 10/11 (32/64) from the official website.
- Install and start GridTracker alongside WSJT-X.
- If GridTracker is installed after WSJT-X, it automatically detects the existing installation and configures the connection between the two applications.
- Configure the connection if it is not detected automatically. GridTracker communicates with WSJT-X using UDP messages.
- Start receiving signals in WSJT-X and watch the stations appear on the map.
For detailed configuration instructions, consult the official GridTracker documentation.
GridTracker is optional. WSJT-X works perfectly well on its own, but the map adds a useful visual dimension to digital amateur radio.
Final thoughts
WSJT-X makes digital amateur radio accessible, even with modest equipment and low transmitting power. Once your radio, audio connection, and computer clock are configured correctly, you can start exploring modes such as FT8, FT4, and more.
📖 Further Reading: For more detailed information about WSJT-X, its configuration, supported digital modes, and advanced features, consult the official WSJT-X User Guide.
Experiment with different bands, observe propagation conditions, and enjoy discovering how far your signal can reach.
73 and good DX!