
Wavelog is a modern web-based amateur radio logging application designed for radio amateurs who want to manage their contacts from anywhere. It provides an intuitive interface for logging QSOs, supports LoTW, eQSL, Club Log, QRZ, SOTA, POTA and many other services, and can easily be integrated into an existing amateur radio station.

Unlike traditional desktop logbooks, Wavelog runs on a web server. This allows you to access your logbook from any computer, tablet or smartphone using nothing more than a web browser. It is also an excellent solution for club stations or operators who use multiple computers.
This guide explains how to install Wavelog on AlmaLinux using the Nginx web server, MariaDB and PHP. Every step is explained in detail so you understand not only which commands to execute, but also why they are necessary.
The installation is performed on a minimal AlmaLinux system and is equally suitable for physical servers, virtual machines and Proxmox LXC containers. While this guide uses an LXC container for demonstration purposes, the installation steps are identical for almost any AlmaLinux deployment.
Although the official Wavelog documentation primarily focuses on Debian and Ubuntu, AlmaLinux is an excellent platform for hosting Wavelog. Its enterprise-grade stability, long support lifecycle and predictable package management make it particularly well suited for always-on amateur radio services.
Throughout this guide we will follow current Wavelog recommendations while adapting every command specifically for AlmaLinux and the Nginx web server.
Let’s begin by preparing the server and installing all required software.
Preparing AlmaLinux
Before installing Wavelog, it is recommended to start with a fully updated AlmaLinux system. Keeping the operating system up to date ensures that you receive the latest security patches, bug fixes and package improvements.
This guide assumes a minimal AlmaLinux installation with root privileges or a user that can execute commands using sudo.
System Requirements
Wavelog itself is lightweight, but allocating sufficient resources will ensure smooth operation.
Minimum recommended resources:
- 2 vCPUs
- 2 GB RAM
- 20 GB available disk space
- Network connectivity
- A static IP address or DNS hostname
For a Proxmox LXC container, these specifications are more than sufficient for a personal amateur radio logbook.
Update the Operating System
First, update all installed packages.
dnf update -yBefore continuing, it is recommended to install a few commonly used administration tools:
sudo dnf install -y vim-enhanced nano git bind-utils net-tools traceroute wget curlIf the update installs a new kernel or important system libraries, reboot the server.
rebootEnable the CRB Repository
Several development libraries and dependency packages used by enterprise software are provided through the CodeReady Builder (CRB) repository.
- AlmaLinux 9 only: The CRB repository is not enabled by default and the
config-managercommand requires thednf-plugins-corepackage. - AlmaLinux 10: No action is required. The CRB repository is enabled by default.
Enable it with:
sudo dnf install dnf-plugins-core
sudo dnf config-manager --set-enabled crb
You can verify that it is enabled by running:
dnf repolistThe CRB repository should now appear in the list.
Install the EPEL Repository
The Extra Packages for Enterprise Linux (EPEL) repository provides additional software that is not included in the default AlmaLinux repositories.
Install it with:
dnf install epel-release -yAfter installation, refresh the package metadata.
dnf makecacheYour AlmaLinux server is now fully prepared for the installation.
In the next chapter, we will install and configure the complete software stack required by Wavelog, including Nginx, MariaDB, PHP-FPM and all necessary PHP extensions.
Installing the LEMP Stack
Wavelog requires a web server, a database server and PHP to process dynamic web pages. This combination is commonly referred to as the LEMP stack, which consists of:
- Linux – the operating system
- Nginx – the web server
- MariaDB – the database server
- PHP-FPM – the PHP interpreter
In this chapter, you will install each component and verify that it is working correctly before continuing with the Wavelog installation.
Install Nginx
Nginx is a lightweight and high-performance web server. It serves the Wavelog website to your browser and forwards PHP requests to PHP-FPM.
Install Nginx:
dnf install nginx -yEnable the service so it starts automatically after every reboot.
systemctl enable nginxStart the service.
systemctl start nginxVerify that Nginx is running.
systemctl status nginxYou should see a line similar to:
Active: active (running)Press Q to exit the status screen.
Install MariaDB
MariaDB stores all Wavelog data, including users, QSOs, station profiles, awards and application settings.
Install the database server.
dnf install mariadb-server -yEnable MariaDB during boot.
systemctl enable mariadbStart the database server.
systemctl start mariadbVerify that the service is running.
systemctl status mariadbAgain, the service should report:
Active: active (running)Secure MariaDB
MariaDB ships with a security script that removes insecure default settings.
Run:
mariadb-secure-installationRecommended answers:
- Switch to unix_socket authentication: Y
- Change the root password: Y (if desired)
- Remove anonymous users: Y
- Disallow remote root login: Y
- Remove the test database: Y
- Reload privilege tables: Y
These settings improve the security of your database server.
Install PHP and Required Extensions
PHP executes the Wavelog application.
Install PHP together with all required extensions.
dnf install php php-fpm php-cli php-common php-mysqlnd php-gd php-curl php-mbstring php-xml php-zip php-opcache php-intl dnf install php-pecl-apcu git unzip -yIf you plan to use Redis as the cache backend, also install:
dnf install php-pecl-redis -yThis package is optional and not required for a standard installation.
Verify the PHP Version
Check the installed PHP version.
php -v
PHP 8.3.31 (cli) (built: May  5 2026 13:35:55) (NTS gcc x86_64)
Copyright (c) The PHP Group
Zend Engine v4.3.31, Copyright (c) Zend Technologies
    with Zend OPcache v8.3.31, Copyright (c), by Zend Technologies
At the time of writing, Wavelog recommends PHP 8.3 or newer.
Enable PHP-FPM
PHP-FPM is responsible for executing PHP scripts requested by Nginx.
Enable the service.
systemctl enable php-fpmStart it.
systemctl start php-fpmVerify that it is running.
systemctl status php-fpmThe service should report:
Active: active (running)Verify All Services
Finally, verify that all required services are active.
systemctl status nginx mariadb php-fpmAll three services should show:
Active: active (running)If one of them is inactive, review its status output before continuing.
Summary
Your AlmaLinux server now has the complete LEMP stack installed. Nginx is ready to serve web pages, MariaDB is running as the database server, and PHP-FPM is prepared to execute Wavelog.
In the next chapter, we will configure PHP for optimal performance and compatibility before downloading the latest version of Wavelog from the official GitHub repository.
Configure PHP for Wavelog
Before downloading and installing Wavelog, PHP needs some basic configuration adjustments. The default PHP settings provided by AlmaLinux are designed for general web applications and are often too restrictive for a complete amateur radio logging application.
In this chapter, we will configure PHP-FPM and adjust important parameters such as memory limits, upload sizes and execution times.
Find the PHP Configuration File
First, check where PHP loads its main configuration file from.
php --iniThe output will look similar to:
Loaded Configuration File: /etc/php.iniOn AlmaLinux, the main PHP configuration file is normally located at:
/etc/php.iniCreate a Backup of the Configuration
Before changing any settings, create a backup.
cp /etc/php.ini /etc/php.ini.default
cp /etc/php.d/10-opcache.ini /etc/php.d/10-opcache.ini.default
If something goes wrong, you can restore the original configuration:
cp /etc/php.ini.backup /etc/php.iniEdit PHP Settings
Open the PHP configuration file.
nano /etc/php.iniIf nano is not installed, install it first:
dnf install nano -ySearch for the following settings and adjust them.
Set the Time Zone
Search for:
;date.timezone =Change it to:
date.timezone = Europe/BerlinA correct time zone is important because Wavelog uses timestamps for QSOs, imports, exports and scheduled tasks.
Increase Memory Limit
Find:
memory_limit = 128MChange it to:
memory_limit = 256MThe memory limit defines how much RAM a single PHP process can use.
For larger installations with many thousands of QSOs, increasing this value to:
memory_limit = 512Mcan be useful.
Configure File Upload Size
Wavelog allows uploads such as ADIF files, images and eQSL card data.
Find:
upload_max_filesize = 2MChange it to:
upload_max_filesize = 32MAlso adjust:
post_max_size = 8Mto:
post_max_size = 32MThe post_max_size value should always be equal to or larger than upload_max_filesize.
Increase Script Execution Time
Long operations such as large ADIF imports can require more processing time.
Find:
max_execution_time = 30Change it to:
max_execution_time = 600This prevents PHP from terminating longer operations too early.
Enable PHP OPcache
OPcache improves PHP performance by storing compiled scripts in memory.
On AlmaLinux, the OPcache configuration is located in:
/etc/php.d/10-opcache.iniEdit the file:
sudo vim /etc/php.d/10-opcache.iniEnsure the following settings are present and uncommented:
opcache.enable=1
opcache.memory_consumption=128
opcache.interned_strings_buffer=16
opcache.max_accelerated_files=10000
opcache.revalidate_freq=60
These values provide a good balance between performance and memory usage for a typical Wavelog installation.
Configure PHP-FPM
Now configure the PHP-FPM service.
Before changing any settings, create a backup.
cp /etc/php-fpm.d/www.conf /etc/php-fpm.d/www.conf.defaultOpen:
nano /etc/php-fpm.d/www.confFind:
user = apache
group = apache
Nginx on AlmaLinux normally communicates with PHP-FPM through the default Apache user configuration. We will adjust this to the Nginx web server user.
Change it to:
user = nginx
group = nginx
Next find:
listen = /run/php-fpm/www.sockKeep this setting. Nginx will later connect to this Unix socket.
Now check the socket permissions:
Find:
listen.owner = nobody
listen.group = nobody
listen.mode = 0660
Change to:
listen.owner = nginx
listen.group = nginx
listen.mode = 0660
Save the file.
PHP Session Permissions
When using nginx with PHP-FPM on AlmaLinux, the PHP session directory may still be configured for the default Apache user:
/var/lib/php/sessionIf the Wavelog installer fails with:
session_start(): Permission deniedadjust the ownership for nginx:
sudo chown root:nginx /var/lib/php/session
sudo chmod 770 /var/lib/php/session
sudo systemctl restart php-fpm
This is a common difference between Debian-based systems (www-data) and AlmaLinux/RHEL systems using nginx.
Restart PHP-FPM
Apply the changes:
systemctl restart php-fpmCheck the service:
systemctl status php-fpmThe service should be running without errors.
Verify PHP-FPM Socket
Check that the socket exists:
ls -la /run/php-fpm/You should see:
www.sockThe socket should belong to the nginx user and group.
Test PHP Processing
Create a temporary PHP test file:
nano /usr/share/nginx/html/info.phpAdd:
<?php
phpinfo();
?>
Restart Nginx:
systemctl restart nginxOpen:
http://your-server-ip/info.phpIf PHP is configured correctly, you will see the PHP information page.
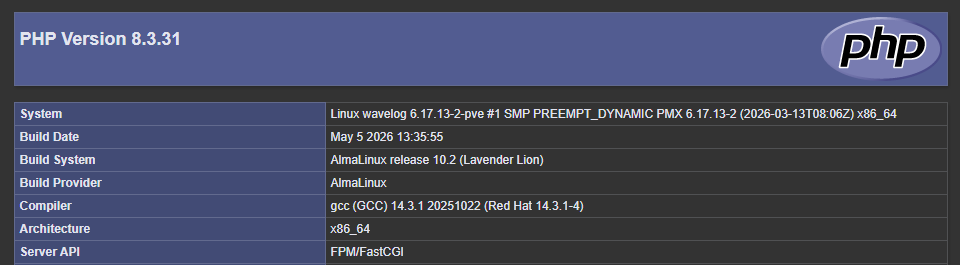
After testing, remove the file because it exposes system information:
rm /usr/share/nginx/html/info.phpSummary
PHP is now configured for Wavelog with suitable resource limits, correct time zone settings and PHP-FPM integration.
The next chapter will download Wavelog from GitHub, prepare the application directory and configure the correct ownership and permissions for Nginx.
Download and Prepare Wavelog
Now that the required software stack is installed and PHP is configured, the next step is downloading the Wavelog application files and preparing the directory structure.
Wavelog recommends using Git for installation because it makes future updates much easier. Instead of manually downloading archives and replacing files, Git allows you to update the installation with only a few commands.
Choose the Installation Directory
For Nginx installations, a common location for web applications is:
/var/www/We will install Wavelog in:
/var/www/wavelogCreate the directory if it does not already exist:
mkdir -p /var/wwwThe directory will later contain the complete Wavelog application.
Download Wavelog Using Git
Change into the web directory:
cd /var/wwwDownload the latest Wavelog version:
git clone --depth 1 https://github.com/wavelog/wavelog.git
Cloning into 'wavelog'...
remote: Enumerating objects: 2180, done.
remote: Counting objects: 100% (2180/2180), done.
remote: Compressing objects: 100% (1710/1710), done.
remote: Total 2180 (delta 485), reused 1321 (delta 339), pack-reused 0 (from 0)
Receiving objects: 100% (2180/2180), 30.77 MiB | 6.80 MiB/s, done.
Resolving deltas: 100% (485/485), done.
The --depth 1 option is important because it downloads only the current version instead of the complete Git history.
This reduces:
- Download size
- Installation time
- Disk usage
After the download completes, verify the files:
ls -la /var/www/wavelogYou should see directories similar to:
application
assets
backup
docker
images
index.php
src
system
updates
uploads
userdata
Set the Correct Ownership
The web server needs access to the Wavelog files.
On AlmaLinux with Nginx, the web server runs as:
nginxChange ownership:
chown -R nginx:nginx /var/www/wavelogThis allows PHP-FPM running under the nginx user to access required files.
Set File Permissions
Wavelog requires several directories to be writable during operation.
The following directories need write access:
application/config/
application/logs/
backup/
updates/
uploads/
images/eqsl_card_images/
First, set standard permissions for all files and directories:
find /var/www/wavelog -type d -exec chmod 755 {} \;Set normal file permissions:
find /var/www/wavelog -type f -exec chmod 644 {} \;Now allow write access to the required directories:
chmod -R 775 \
/var/www/wavelog/application/config \
/var/www/wavelog/application/logs \
/var/www/wavelog/backup \
/var/www/wavelog/updates \
/var/www/wavelog/uploads \
/var/www/wavelog/images/eqsl_card_images
Why Are These Permissions Required?
During normal operation, Wavelog needs to write data such as:
- Configuration settings
- Application logs
- Uploaded ADIF files
- Images
- Updates
Without these permissions, the installation wizard may fail or Wavelog may show permission errors later.
The permissions above are a practical balance between functionality and security. After installation, permissions can be reviewed and tightened further if required.
Configure SELinux Contexts
AlmaLinux uses SELinux by default. SELinux provides additional security by controlling which services are allowed to access files.
Even if normal Linux permissions are correct, SELinux can still block Nginx or PHP-FPM.
Check SELinux Status
- SELinux (Security-Enhanced Linux) is enabled by default on a standard AlmaLinux 10 installation and provides an additional security layer through mandatory access controls.
- For LXC containers, SELinux should be checked and managed on the host system instead. A disabled status inside the container does not necessarily indicate a problem.
Check the current SELinux status with:
sestatusA typical installation should show:
SELinux status:                 enabled
SELinux mode:                   enforcing
If the system is running inside an LXC container, SELinux is usually not available and will show:
SELinux status: disabledThis is expected behavior because the SELinux kernel features are provided by the host system and are generally not enabled inside unprivileged containers.
Install SELinux tools:
dnf install policycoreutils-python-utils -yAllow the Wavelog directory to be accessed by the web server:
semanage fcontext -a -t httpd_sys_content_t "/var/www/wavelog(/.*)?"The writable directories need a different SELinux type:
semanage fcontext -a -t httpd_sys_rw_content_t "/var/www/wavelog/(application/config|application/logs|backup|updates|uploads|images/eqsl_card_images)(/.*)?"Apply the new contexts:
restorecon -Rv /var/www/wavelogNow SELinux knows which files Nginx may read and which directories PHP may write to.
Verify the Installation Files
Check the directory ownership:
ls -ld /var/www/wavelogExpected output:
drwxr-xr-x nginx nginxCheck one writable directory:
ls -ld /var/www/wavelog/uploadsIt should show write permissions for the nginx user.
Summary
Wavelog is now downloaded and prepared for the web server.
The application files are located in:
/var/www/wavelogNginx and PHP-FPM have the required permissions, and SELinux has been configured correctly.
In the next chapter, we will create the MariaDB database and user that Wavelog requires to store QSOs, user accounts and configuration data.
Create the MariaDB Database for Wavelog
Wavelog stores all application data inside a MariaDB database. This includes:
- User accounts
- Station information
- QSOs (contacts)
- Awards
- Settings
- Logbook data
- Integration settings
Before starting the Wavelog web installer, the database and a dedicated database user must be created.
For security reasons, Wavelog should not use the MariaDB root account. Instead, we create a separate database user with access only to the Wavelog database.
Connect to MariaDB
Log in to MariaDB as the database administrator.
On AlmaLinux, use:
mariadb -u root -pEnter the MariaDB root password when requested.
If you configured MariaDB with socket authentication, you can also use:
mariadbAfter successful login, you will see the MariaDB prompt:
MariaDB [(none)]>All following SQL commands are executed inside this prompt.
Create the Wavelog Database
Create a dedicated database.
Example:
CREATE DATABASE wavelog CHARACTER SET utf8mb4 COLLATE utf8mb4_unicode_ci;
Query OK, 1 row affected (0.002 sec)
Why utf8mb4?
Wavelog stores international characters, station names and user information. The utf8mb4 character set supports the complete Unicode range and is recommended for modern applications.
Verify that the database exists:
SHOW DATABASES;
Query OK, 1 row affected (0.002 sec)

MariaDB [(none)]> SHOW DATABASES;
+--------------------+
| Database           |
+--------------------+
| information_schema |
| mysql              |
| performance_schema |
| sys                |
| wavelog            |
+--------------------+
5 rows in set (0.001 sec)
You should see:
wavelogCreate a Dedicated Database User
Now create a separate MariaDB user for Wavelog.
Replace the password with a strong password of your choice.
Example:
CREATE USER 'dbo_wavelog'@'localhost' IDENTIFIED BY 'ChangeThisStrongPassword';
Query OK, 0 rows affected (0.002 sec)
The user is restricted to local access only. This means it cannot connect remotely from another server.
Grant Database Permissions
Give the user full access to the Wavelog database:
GRANT ALL PRIVILEGES ON wavelog.* TO 'dbo_wavelog'@'localhost';
Query OK, 0 rows affected (0.001 sec)
Apply the permission changes:
FLUSH PRIVILEGES;
Query OK, 0 rows affected (0.000 sec)
Verify the Database User
Check that the user exists:
SELECT User, Host FROM mysql.user;
Query OK, 0 rows affected (0.001 sec)

MariaDB [(none)]> SELECT User, Host FROM mysql.user;
+-------------+-----------+
| User        | Host      |
+-------------+-----------+
| dbo_wavelog | localhost |
| mariadb.sys | localhost |
| mysql       | localhost |
| root        | localhost |
+-------------+-----------+
4 rows in set (0.001 sec)
You should see:
dbo_wavelog | localhostTest the Database Login
Exit MariaDB:
EXIT;Now test the newly created user:
mariadb -u dbo_wavelog -p wavelog
Enter password:
Welcome to the MariaDB monitor.  Commands end with ; or \g.
Your MariaDB connection id is 15
Server version: 10.11.18-MariaDB MariaDB Server

Copyright (c) 2000, 2018, Oracle, MariaDB Corporation Ab and others.

Type 'help;' or '\h' for help. Type '\c' to clear the current input statement.
Enter the password.
If the login works, you will see:
MariaDB [wavelog]>Exit again:
EXIT;MariaDB Configuration Check
Wavelog requires the InnoDB storage engine.
Check that InnoDB is available:
mariadb -e "SHOW ENGINES;" | grep InnoDBThe output should contain:
InnoDB DEFAULT Supports transactions, row-level locking, foreign keys and encryption for tables YES YES YESInnoDB is required because Wavelog uses transactions and relational database features.
Database Backup Recommendation
Before continuing with the installation, it is recommended to already plan regular backups.
A simple manual backup command is:
mariadb-dump -u root -p wavelog > wavelog_backup.sqlLater in this guide, we will create an automated backup strategy including scheduled tasks.
Summary
The MariaDB database is now ready for Wavelog.
Created:
Database:
wavelogDatabase user:
waveloguserThe next chapter will configure Nginx for Wavelog. This is an important step because Wavelog requires PHP files to be correctly forwarded to PHP-FPM and specific security settings for the web server.
Configure Nginx for Wavelog
Nginx is now installed, but the default configuration is not sufficient for Wavelog. The web server needs to know where the Wavelog files are located and how PHP requests should be processed.
Unlike Apache, Nginx does not process PHP files directly. Instead, it forwards PHP requests to PHP-FPM using FastCGI.
In this chapter, we will:
- Create a dedicated Nginx server configuration
- Configure the Wavelog document root
- Enable PHP processing
- Configure security-related settings
- Test the Nginx configuration
Create the Nginx Configuration File
On AlmaLinux, additional website configurations are commonly stored in:
/etc/nginx/conf.d/Create a new configuration file:
nano /etc/nginx/conf.d/wavelog.confAdd the following configuration:
server {
    listen 80;
    server_name wavelog.examplecorp.io;

    return 301 https://$host$request_uri;
}


server {
    listen 443 ssl;
    server_name wavelog.examplecorp.io;

    root /var/www/wavelog;
    index index.php index.html;

    access_log /var/log/nginx/wavelog_access.log;
    error_log /var/log/nginx/wavelog_error.log;

    ssl_certificate /etc/pki/tls/certs/wavelog.examplecorp.io.crt;
    ssl_certificate_key /etc/pki/tls/private/wavelog.examplecorp.io.key;

    client_max_body_size 10M;

    location / {
        try_files $uri $uri/ /index.php?$query_string;
    }

    location ~ \.php$ {
        include fastcgi_params;
        fastcgi_pass unix:/run/php-fpm/www.sock;
        fastcgi_param SCRIPT_FILENAME $document_root$fastcgi_script_name;
    }

    location ~ /\. {
        deny all;
    }
}
Save the file.
Test the Nginx Configuration
Before restarting Nginx, check the configuration syntax.
Run:
nginx -tA successful result looks like:
syntax is ok
test is successful
If you see an error, correct the configuration before continuing.
Restart Nginx
Apply the new configuration:
systemctl restart nginxVerify the service:
systemctl status nginxConfigure the Firewall (Optional)
If firewalld is enabled, HTTP access must be allowed.
Check the firewall status:
systemctl status firewalldIf it is running, add HTTP:
firewall-cmd --permanent --add-service=httpApply the changes:
firewall-cmd --reloadFor HTTPS later, we will also add:
firewall-cmd --permanent --add-service=httpsFirst Browser Test
Open a browser and access:
http://your-server-ip/or:
http://wavelog.examplecorp.io/At this point, the Wavelog installer should appear or a PHP-related message should be displayed.
If you receive:
- 502 Bad Gateway → PHP-FPM is not running or socket permissions are wrong
- 403 Forbidden → permissions or SELinux configuration issue
- 404 Not Found → Nginx document root or rewrite configuration problem
Summary
Nginx is now correctly configured for Wavelog.
The web server can:
- Serve Wavelog files
- Forward PHP requests to PHP-FPM
- Handle framework URLs
- Protect sensitive files
In the next chapter, we will start the Wavelog web installer and complete the application setup using the database created earlier.
Run the Wavelog Web Installer
The server environment is now prepared:
- Nginx is running
- PHP-FPM is configured
- MariaDB database is available
- Wavelog files are installed
- File permissions are set
The final part of the installation is completed through the Wavelog web installer.
The installer checks the server environment, creates the required database tables and prepares the initial configuration.
Open the Wavelog Installer
Open your browser and navigate to:
http://your-server-ip/or:
http://wavelog.examplecorp.io/If everything is configured correctly, Wavelog will automatically redirect you to:
/installExample:
http://wavelog.examplecorp.io/install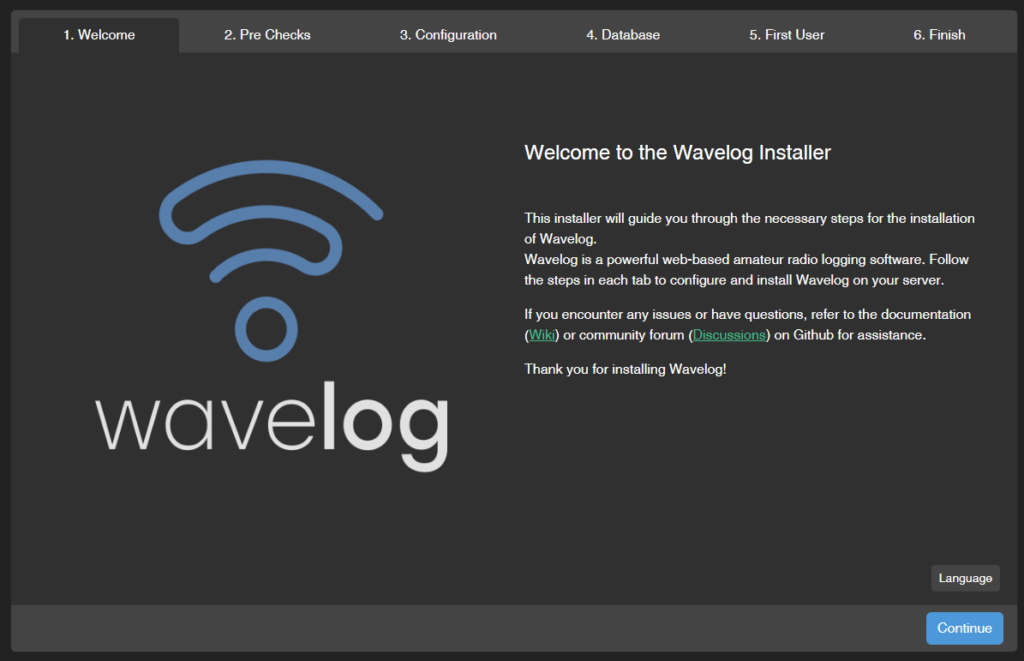
Installation Check
The first installer page performs several system checks.
Wavelog verifies:
- PHP version
- Required PHP extensions
- Directory permissions
- Database availability
- Configuration file access
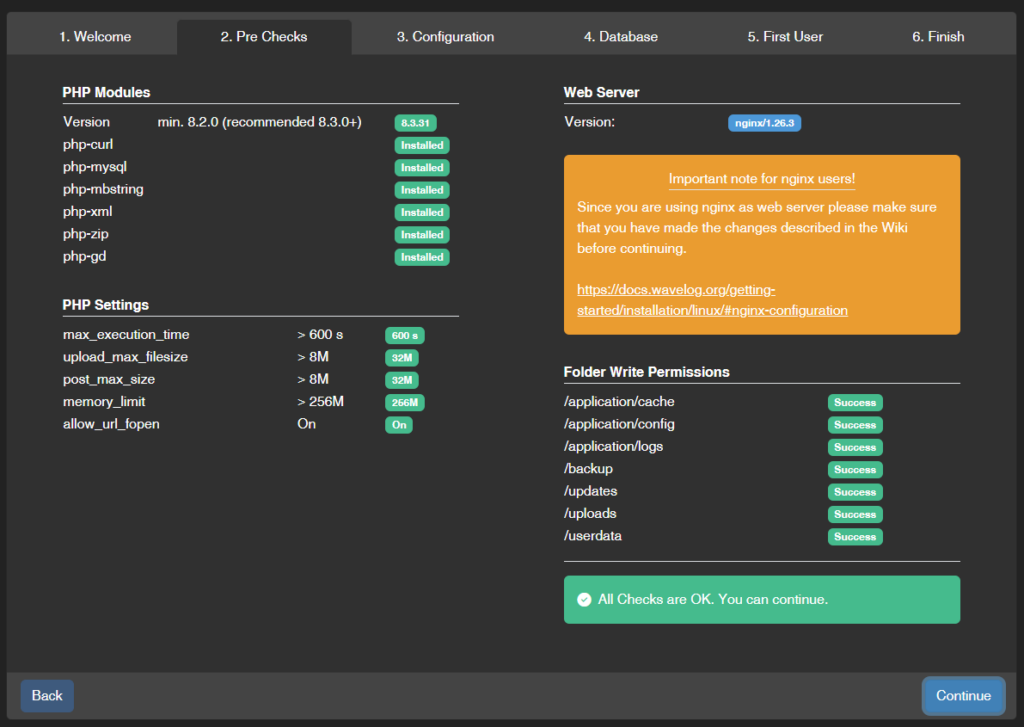
All checks should show as successful.
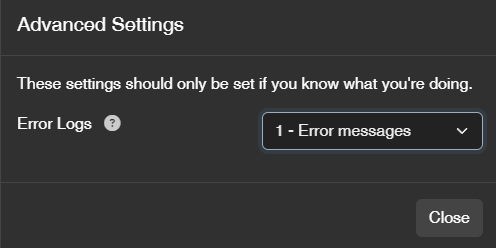
If a check fails, correct the problem before continuing.
Database Configuration
The installer will ask for the MariaDB connection details.
Use the values created earlier.
Example:
Database type:
MySQL / MariaDBDatabase hostname:
localhostDatabase name:
wavelogDatabase username:
dbo_wavelogDatabase password:
YourDatabasePasswordThe database hostname should remain:
localhostbecause MariaDB runs on the same server.
Click the database test button.
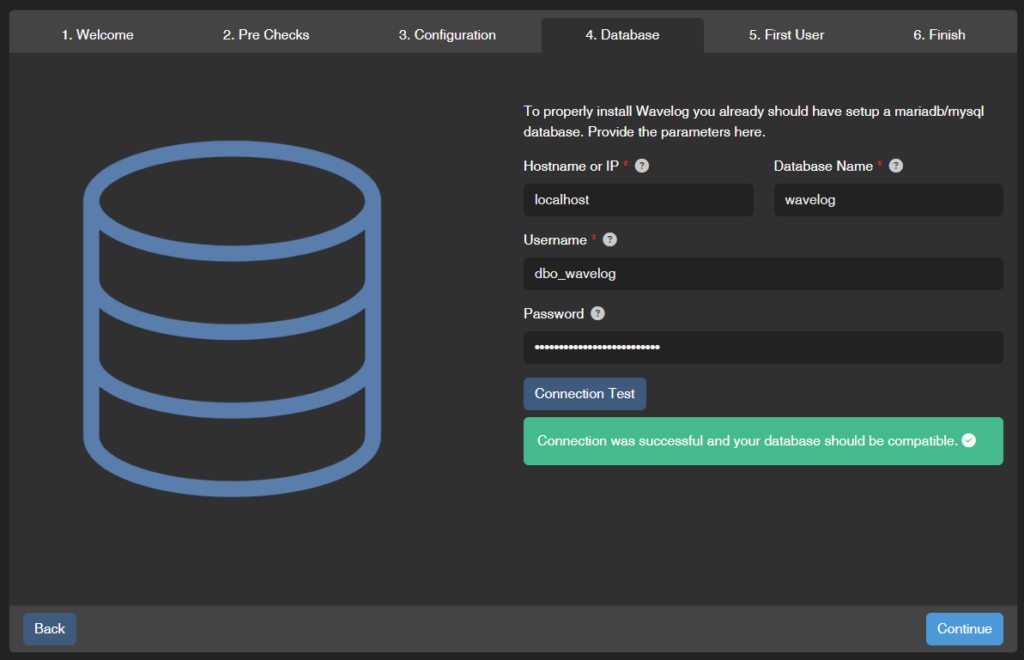
If the connection succeeds, continue.
Create the First Administrator Account
The installer will ask you to create the first Wavelog administrator account.
Choose:
- Username
- Email address
- Strong password
This account will have full administrative access.
Use a strong password because this account controls:
- User management
- System configuration
- Integrations
- Database-related functions
Configure Basic Station Information
After creating the administrator account, Wavelog asks for basic station information.
Typical settings include:
- Callsign
- Operator name
- Station location
- Grid locator
- Time zone
Example:
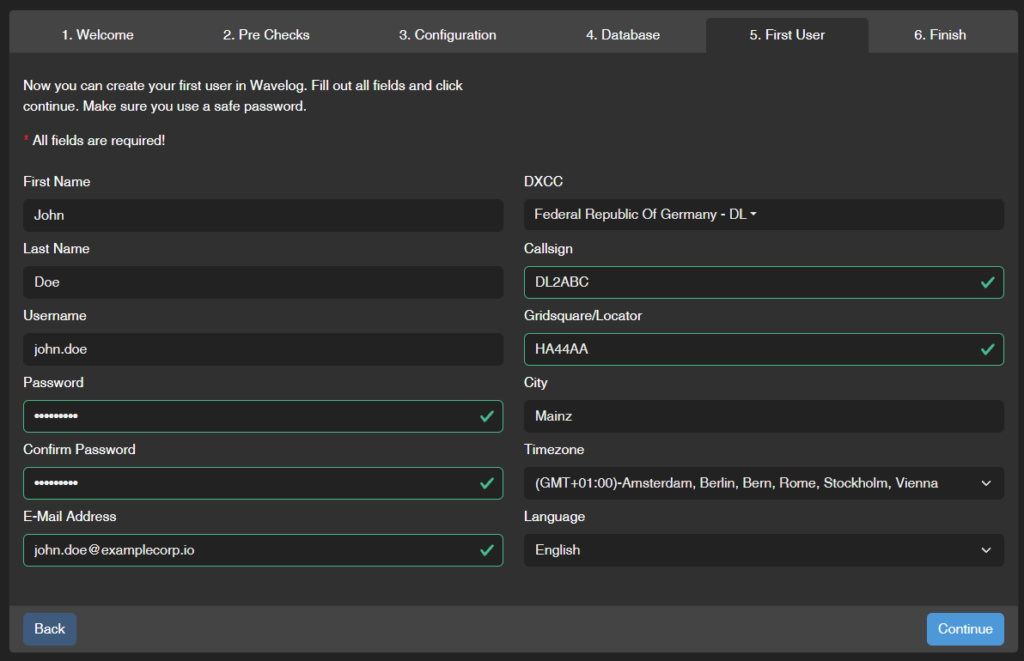
The station information can be changed later in the administration menu.
Complete the Installation
When the installer finishes successfully, Wavelog creates the configuration files and initializes the database.
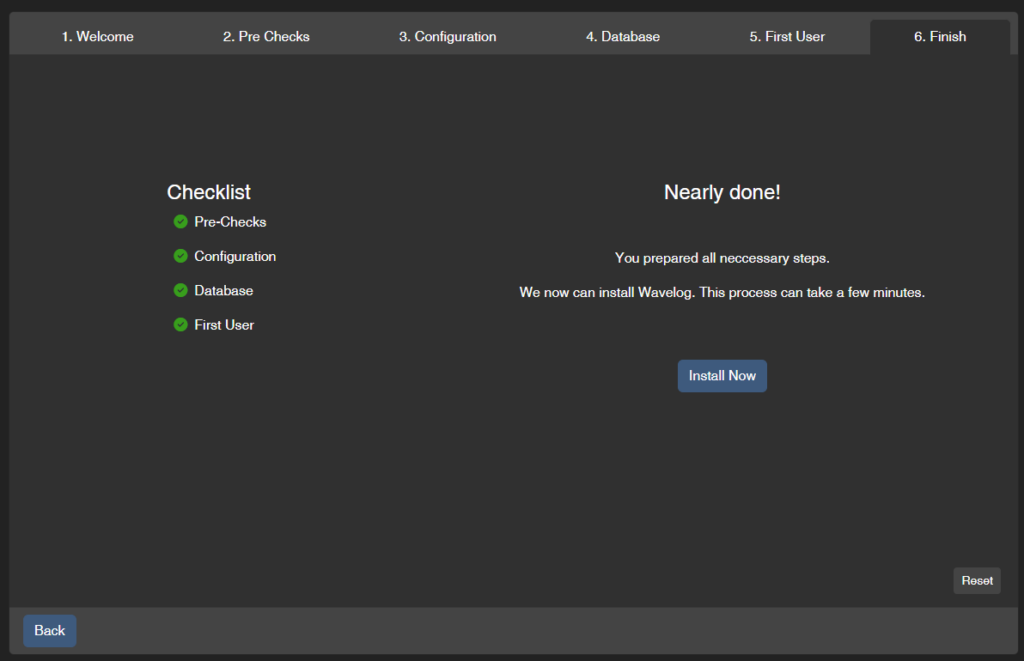
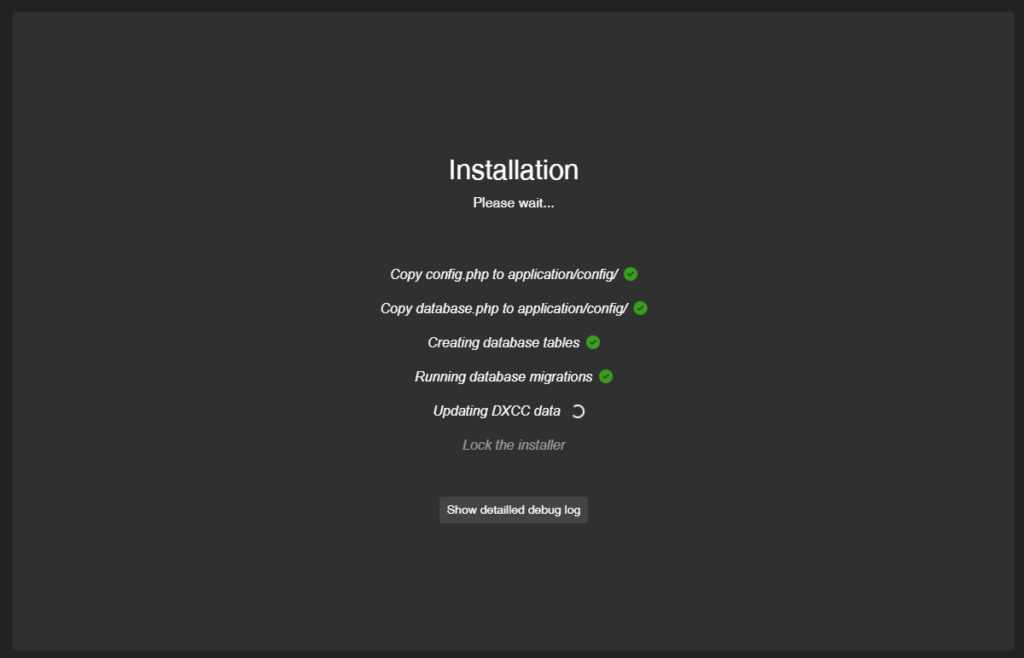
You should now see the Wavelog login page.
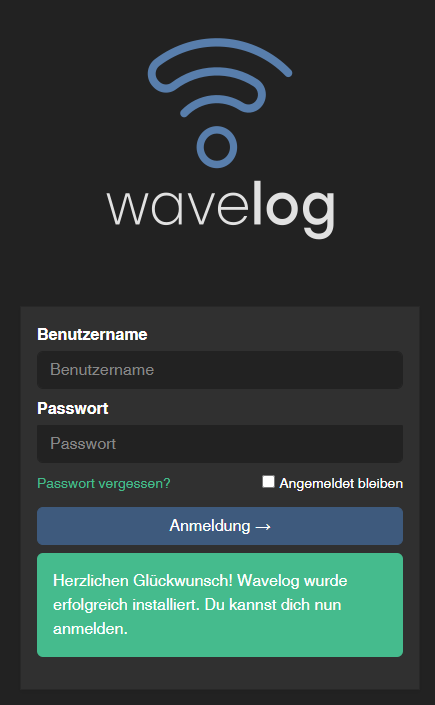
Log in using the administrator account created during installation.
Remove Installation Access
After successful installation, the installer should no longer be accessible.
For additional security, verify that the installation directory cannot be used again.
Check:
ls -la /var/www/wavelogIf an installer directory remains accessible, remove it according to the current Wavelog documentation.
Never leave an active installation wizard exposed on a public server.
Initial Dashboard Check
After the first login, open the Wavelog dashboard.
Check for warnings.
Typical messages include:
- Missing cron jobs
- Missing external service configuration
- Recommended security settings
These warnings are normal after a fresh installation.
Test a First QSO Entry
Before configuring advanced features, test the basic logbook function.
Create a test QSO:
- Enter a callsign
- Select frequency and mode
- Save the contact
Verify that:
- The QSO appears in the logbook
- Statistics are updated
- No errors appear in the logs
Check Application Logs
If problems occur, Wavelog logs can be found here:
/var/www/wavelog/application/logs/View recent entries:
tail -f /var/www/wavelog/application/logs/*Summary
The Wavelog installation is now complete.
You have successfully:
- Installed the application
- Connected it to MariaDB
- Created the administrator account
- Verified basic operation
The next chapter covers the important post-installation tasks, including cron jobs, automatic maintenance tasks and recommended Wavelog configuration steps.
Configure Wavelog Cron Jobs and Maintenance Tasks
After the initial installation, Wavelog is fully functional. However, several background tasks should be automated to keep the system running correctly.
https://docs.wavelog.org/admin-guide/administration/cron-jobs
Wavelog uses cron jobs to perform regular maintenance tasks such as:
- Updating LoTW user information
- Processing background jobs
- Running scheduled maintenance tasks
- Cleaning temporary files
- Updating statistics
Without cron jobs, some functions will only run when manually started.
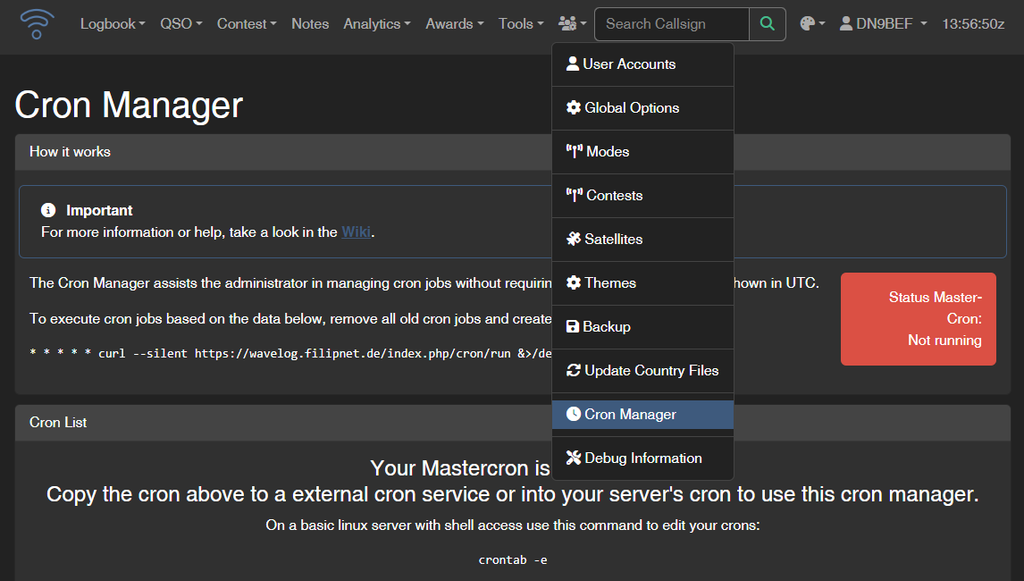
Configure Wavelog Cron Jobs
Wavelog requires a cron job to run its background tasks. The easiest approach is to use the system-wide crontab.
Edit the system crontab:
sudo nano /etc/crontabAdd the Wavelog Master Cron:
# Wavelog Master Cron
* * * * * nginx curl --silent https://<URL-To-WAVELOG>/index.php/cron/run &>/dev/null
Replace <URL-To-WAVELOG> with the URL or IP address of your Wavelog installation.
The nginx user is used because PHP-FPM runs under this account.
Verify the Cron Configuration
Display the system crontab:
cat /etc/crontabYou should see the Wavelog entry.
No separate Wavelog service needs to be started. The crond service executes the scheduled task automatically.
Check that crond is running:
sudo systemctl status crondIf necessary, enable and start it:
sudo systemctl enable --now crondSelf-Signed SSL Certificates
If Wavelog uses a self-signed SSL certificate, add the -k option to the curl command:
# Wavelog Master Cron
* * * * * nginx curl -ks --silent https://<URL-To-WAVELOG>/index.php/cron/run &>/dev/null
Additionally, enable insecure connections in the Wavelog configuration:
sudo nano /var/www/wavelog/application/config/config.phpAdd or edit:
$config['cron_allow_insecure'] = true;Save the file and exit.
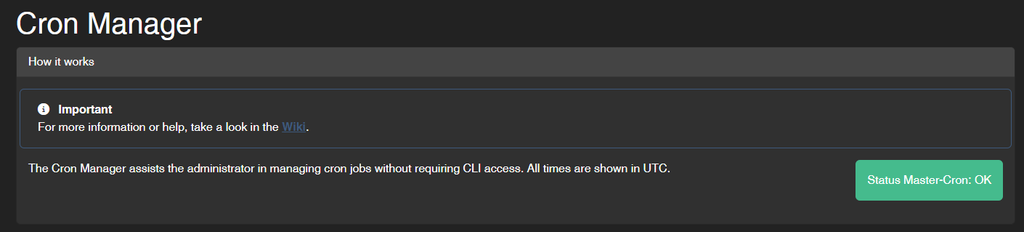
Source: Wavelog Documentation – Cron Jobs
Trust Internal CA Certificates
If your server uses a self-signed certificate or an internal CA, add the Root CA and, if applicable, the Subordinate CA to the AlmaLinux trusted certificate store. Otherwise, PHP/cURL may fail with errors such as:
CRON: Manual execution of update_lotw_users failed: SSL certificate problem: unable to get local issuer certificateCopy the CA certificates to the trusted anchors directory:
cp root-ca.crt /etc/pki/ca-trust/source/anchors/
cp sub-ca.crt /etc/pki/ca-trust/source/anchors/
Update the system trust store:
update-ca-trustRestart PHP-FPM:
systemctl restart php-fpm💡 Tip: Always install the CA certificate that issued the server certificate. If a Subordinate CA is used, install the Root CA and Subordinate CA as well. Do not disable SSL certificate verification to work around trust errors.
Check Wavelog Dashboard Warnings
After logging in, open:
Administration → DashboardReview all warnings.
Typical messages:
- Cron jobs not configured
- Missing API configuration
- No backup configured
- HTTPS not enabled
Resolve these one by one.
Configure Log Rotation
Wavelog creates application logs. Over time, these files can grow.
AlmaLinux already provides log rotation through logrotate.
Create a custom configuration:
nano /etc/logrotate.d/wavelogAdd:
/var/www/wavelog/application/logs/* {
    weekly
    rotate 12
    compress
    missingok
    notifempty
}
This keeps approximately three months of logs while compressing older files.
Restart Services After Configuration Changes
After changing PHP, Nginx or Wavelog configuration, restart the relevant services.
Restart PHP-FPM:
systemctl restart php-fpmRestart Nginx:
systemctl restart nginxSummary
Wavelog now has automated background maintenance.
Configured:
- Cron scheduler
- Background processing
- LoTW updates
- Log management
The next chapter focuses on securing the installation with HTTPS using Let’s Encrypt, firewall configuration and additional hardening recommendations for a publicly accessible Wavelog server.
Backup Strategy for Wavelog
A Wavelog installation contains valuable amateur radio data. Over time, your logbook may contain thousands of QSOs, uploaded QSL images, station information and configuration settings.
A hardware failure, accidental deletion or configuration mistake could result in permanent data loss. Therefore, regular backups are an essential part of a reliable Wavelog installation.
A complete Wavelog backup consists of:
- MariaDB database
- Wavelog configuration files
- Uploaded files
- Images and attachments
Backup Locations
The following directories contain important Wavelog data.
Main installation:
/var/www/wavelogImportant writable directories:
/var/www/wavelog/application/config/
/var/www/wavelog/uploads/
/var/www/wavelog/images/
/var/www/wavelog/backup/
The MariaDB database contains the majority of your logbook data.
Create a Backup Directory
Create a dedicated backup location outside the web directory.
Example:
mkdir -p /backup/wavelogSet secure permissions:
chmod 700 /backup/wavelogThis prevents unauthorized users from accessing your backups.
Backup the MariaDB Database
Create a database dump using mariadb-dump.
Command:
mariadb-dump -u root -p wavelog > /backup/wavelog/wavelog_database.sqlEnter the MariaDB root password.
The resulting file contains:
- User data
- QSOs
- Configuration data
- Application settings
Check the backup file:
ls -lh /backup/wavelog/Example:
wavelog_database.sqlCompress the Database Backup
Compression significantly reduces storage requirements.
gzip /backup/wavelog/wavelog_database.sqlThe result:
wavelog_database.sql.gzBackup Wavelog Files
Create an archive of the Wavelog installation:
tar -czf /backup/wavelog/wavelog_files.tar.gz /var/www/wavelogThis includes:
- Configuration files
- Uploaded images
- Customizations
- Application files
Create an Automated Backup Script
Instead of running backups manually, create a script.
Create:
nano /usr/local/bin/backup-wavelog.shAdd:
#!/bin/bash

BACKUP_DIR="/backup/wavelog"
DATE=$(date +"%Y-%m-%d")

mkdir -p "$BACKUP_DIR"

mariadb-dump -u root -pYourPassword wavelog \
> "$BACKUP_DIR/database-$DATE.sql"

tar -czf "$BACKUP_DIR/files-$DATE.tar.gz" \
/var/www/wavelog

find "$BACKUP_DIR" -type f -mtime +30 -delete
Save the file.
Make it executable:
chmod 700 /usr/local/bin/backup-wavelog.shImportant Security Note
Avoid storing database passwords directly inside scripts on production systems.
A better approach is using:
- MariaDB configuration files
- Restricted backup users
- Environment files with correct permissions
For a private amateur radio installation, the script method can be acceptable if the server is properly protected.
Schedule Automatic Backups
Create a cron entry:
crontab -eExample:
30 2 * * * /usr/local/bin/backup-wavelog.shThis runs the backup every day at 02:30.
Verify Backups Regularly
A backup is only useful if it can be restored.
Check the archive contents:
tar -tzf /backup/wavelog/files-2026-07-21.tar.gz | headCheck the database dump:
gzip -t /backup/wavelog/database-2026-07-21.sql.gzRestore a Database Backup
To restore a database:
First recreate the database:
mariadb -u root -pInside MariaDB:
DROP DATABASE wavelog;
CREATE DATABASE wavelog CHARACTER SET utf8mb4 COLLATE utf8mb4_unicode_ci;
EXIT;
Restore the backup:
gunzip database-backup.sql.gz

mariadb -u root -p wavelog < database-backup.sql
Offsite Backup Recommendation
Do not keep the only backup on the same server.
Better options:
- Another server
- NAS system
- External storage
- Encrypted cloud storage
For a home amateur radio installation, a simple NAS backup is often sufficient.
Summary
Your Wavelog installation now has a backup strategy.
Protected:
- Database content
- QSOs
- Uploaded images
- Configuration files
Regular backups ensure that years of amateur radio contacts are not lost because of a disk failure or configuration mistake.
The next chapter covers updates and maintenance, including how to safely update Wavelog without losing configuration or data.
Conclusion
Wavelog is a powerful and flexible solution for amateur radio operators who want a modern, self-hosted logbook platform. Running Wavelog on AlmaLinux with Nginx, MariaDB and PHP provides a stable, secure and efficient foundation that can be operated for many years.
The result is a professional amateur radio logging platform that can be accessed securely from anywhere while keeping full control of your own data.
Recommended Next Steps
After completing the installation, consider configuring additional Wavelog features:
- Connect external services such as LoTW, eQSL, QRZ or Club Log
- Configure automatic ADIF imports
- Add station information and equipment details
- Set up regular offsite backups
- Monitor system resources
- Keep AlmaLinux and Wavelog updated regularly
Keep Your Logbook Safe
A logbook represents many years of amateur radio activity. Regular backups and timely updates are just as important as the initial installation.
A well-maintained Wavelog server requires very little administration and can run reliably on small hardware such as a virtual machine or Proxmox LXC container.
Final Thoughts
Self-hosting Wavelog gives amateur radio operators complete control over their logging environment. Instead of depending on external services, your QSOs remain on your own server while still providing modern features expected from a professional logging application.
With AlmaLinux, Nginx and MariaDB, you have a robust platform that combines enterprise stability with the flexibility needed for a personal amateur radio station.
73 and happy logging!